Basics of Magento Store Testing for Merchants [Website Testing Checklist]
It is obviously better if testing a website is provided by specialists who know the platform and process perfectly well.
But what to do if the services of experienced quality assurance & testing professionals are not available for some reason, and you need to check the website right now?
Keep in mind that this website testing checklist doesn’t contain comprehensive information but only covers the basics to help you understand whether your online store works well.
Website Testing as an Admin
First, make sure that you can log in to the Magento Admin Panel and all its sections are available to you.
#1 Modules and Extensions
You inevitably know which custom modules and extensions should be installed on your website. Check if they are available in the admin panel and whether it’s possible to configure them.
(*The availability of this feature for each module should be placed in the description from developers. There should also be information on where a particular module is located in the Magento Admin Panel).
#2 Attributes and Attribute Sets
- ✓ Make sure that all the required attributes are created and collected in attribute sets;
- ✓ Сreate an attribute to test that this function works as expected;
- ✓ Add it to the attribute set and see if it appears on products that have this attribute set.
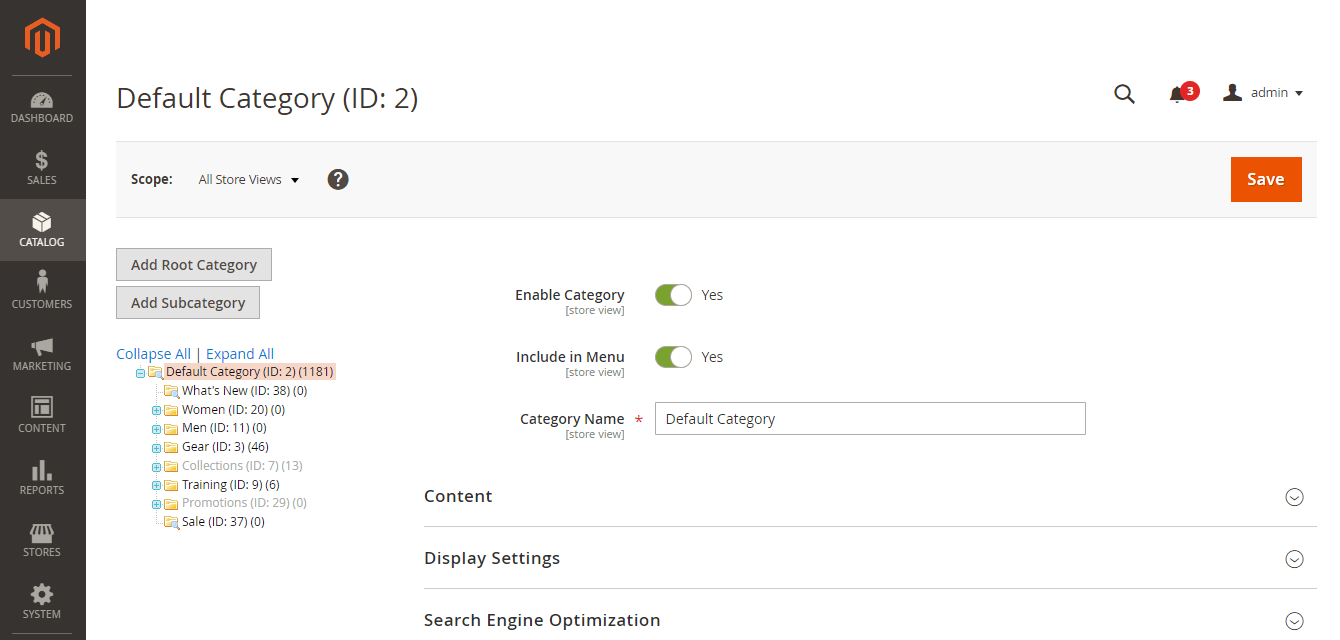
#3 Categories
Make sure that:
- ✓ a list of categories is available in Catalog > Categories;
- ✓ a category tree is structured according to your requirements;
- ✓ products are assigned in the category;
- ✓ you can add, edit, delete categories.
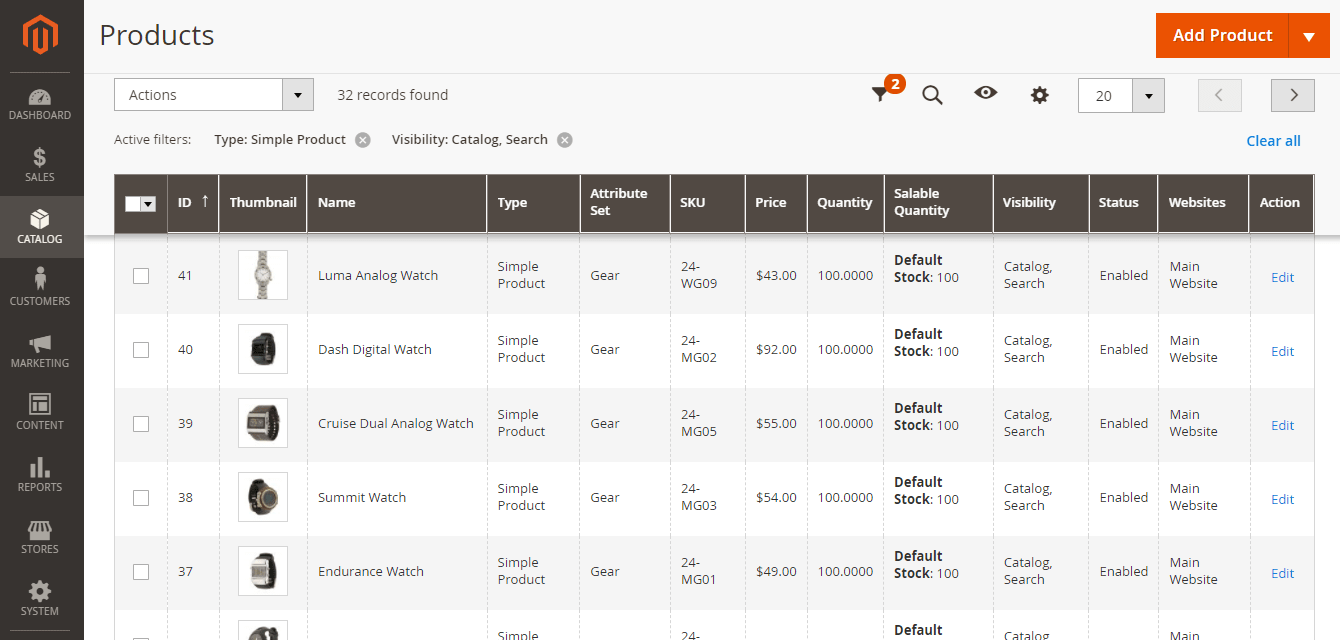
#4 Creating & Editing Products
Check that:
- ✓ products are available in Catalog > Products;
- ✓ you can create, edit, delete all types of products used on your website;
- ✓ products have attributes from the given attribute set;
- ✓ products are displayed on the category page in which they are assigned;
- ✓ the created product is available on the storefront at the specified URL.
Reasons Why the Created Product Doesn’t Display on the Website
- 1. The product has visibility ‘Not Visible Individually.’
- 2. Product is out of stock (Qty=0 and/or Stock Status=Out of Stock) and ‘Display Out of Stock Products=No’ is set in the site settings.
- 3. Indexing is needed. You can wait for the automatic indexing if Cron is already configured on the website, or you can do it manually. The easiest way is to go to System > Tools > Index Management, set the product indexing Update on Save, and save the product changes again.
- 4. Your website has links with .html that don’t appear in the admin panel’s Product URL attribute. To fix it, you should manually add it to the browser address bar. In other words, instead of https://yourwebsite.com/product, the link should look like the following way: https://yourwebsite.com/product.html You can also go to the product page via a direct link indicating the product ID. Here’s an example of a link: https://yourwebsite.com/catalog/product/view/id/1, where the number at the end of the link is the ID of the product you are looking for (you can see it in the admin panel).
- 5. Resetting Magento Cache is needed by going to System > Cache Management.
- 6. Clearing browser cache is required.
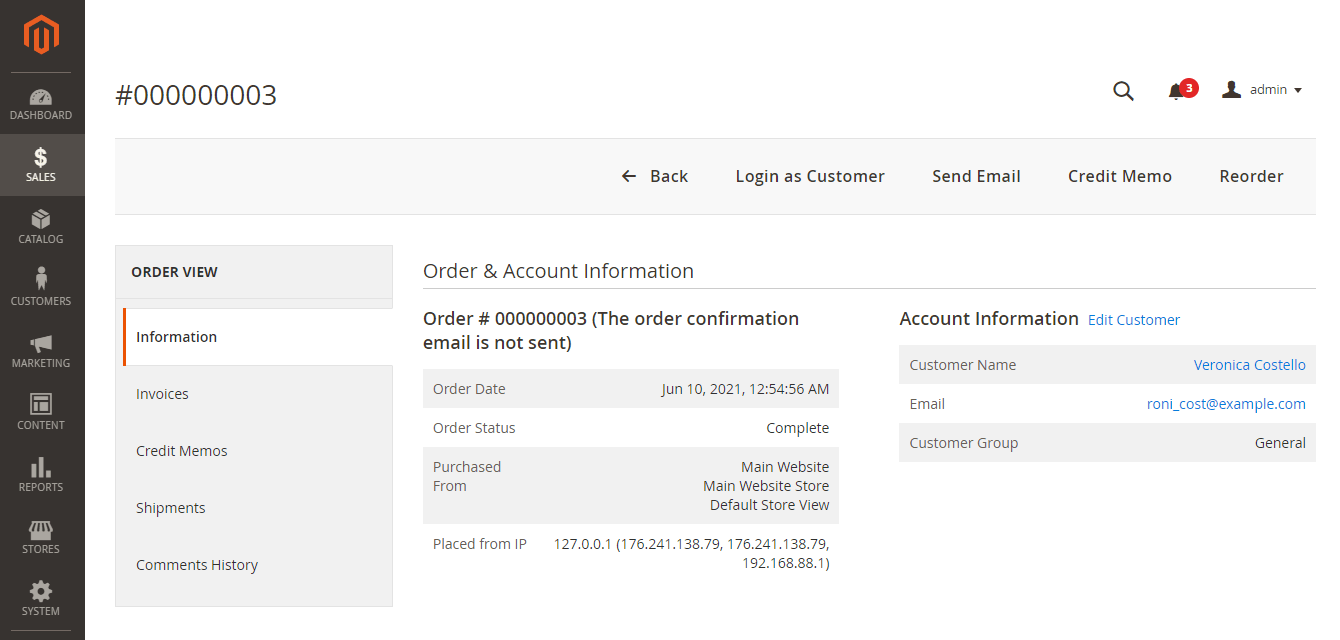
#5 Operations with Orders
Create a new order in Sales > Orders > Create New Order
Check that:
- ✓ the stock of products selected for the order has decreased by the quantity specified in the order;
- ✓ an order is displayed in the Orders Grid;
- ✓ all Order Details are displayed correctly;
- ✓ editing of Order Details is available;
- ✓ you can change the order status;
- ✓ it’s possible to create Invoice, Shipping, Credit Memo (if you’re going to use this function), Return, which are displayed in the tabs of the Sales section;
- ✓ when creating a Credit Memo, there’s a checkmark in front of Return to Stock, so that Product Inventory is able to increase by the number of returned products;
- ✓ when the order status is changed to Canceled, all products are returned to stock.
#6 Users
Users are displayed in the Customers Grid (Customers > All Customers), where you can also create a new user (Customers > All Customers > Create New Customer).
Make sure that:
- ✓ all Customer Details are displayed correctly;
- ✓ Customer Details can be edited;
- ✓ password reset is available;
- ✓ you can remove a Customer;
- ✓ you can create, edit, delete Customer Groups (Customers > Customer Groups);
- ✓ you can add customers into Customer Groups and remove them from there.
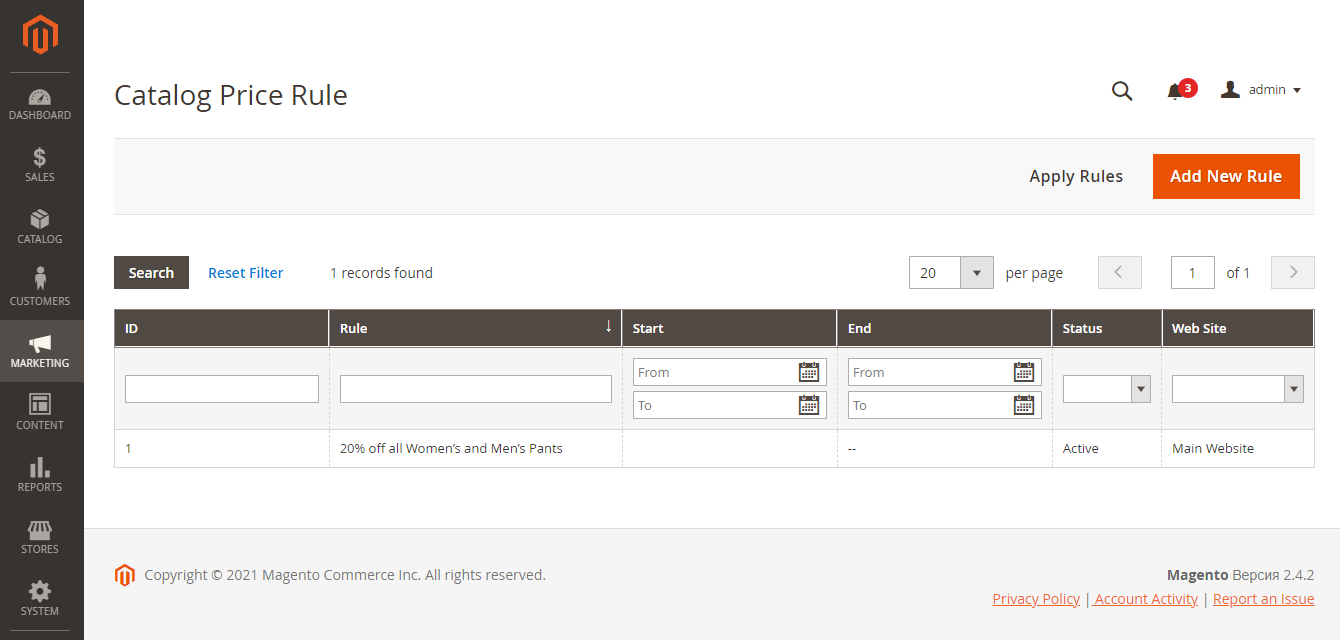
#7 Promotions
Find Marketing > Promotions, and check there that it’s possible to:
- ✓ create a Catalog Price Rule, which is applied on storefront then;
- ✓ create different Cart Price Rules, which are applied when making orders.
#8 Website Configuration
In the Stores tab, check that all basic settings work according to the requirements, while Taxes, Currency, Stock, Sources are customized as expected.
Check Stores > Settings > Configuration, where you can set information about the store, e-mail addresses, payments, shipping, etc.
Website Testing as a Customer on Storefront
When checking the storefront website, pay attention to the compliance of the web pages with the design and the functionality.
Visually evaluate the cohesiveness of the pages, the presence of all elements, and their behavior while using the website (the elements don’t move, disappear, or break during the user interaction with the website).
If the Perfect Pixel requirement needs to be fulfilled, perform the check separately using special tools like the Perfect Pixel plugin for browsers. In this case, it’s necessary to check compliance at all resolutions.
Also, perform the storefront check in different browsers, according to the initial requirements and mobile devices. If you are not sure which browsers are relevant, you can use websites that display statistics on the use of browsers in the world or search for data on the country of interest.
Please pay attention to the fact that if you have multiple websites, store views, or languages, you’d better provide checks for each of them.
#1 Critical User Path
Check the following stages first of all:
- ✓ purchase of products by a guest (if the requirements provide this option);
- ✓ new user registration;
- ✓ purchase by a logged-in user;
- ✓ availability of all User Account sections;
- ✓ there’s an option to log in, log out, reset a forgotten password.
#2 Homepage and Navigation
Make sure that:
- ✓ homepage elements are displayed and work correctly;
- ✓ banners are clickable and redirect users to relevant pages;
- ✓ header and footer elements are displayed and work well;
- ✓ links in the header and footer redirect users to the particular pages;
- ✓ the menu is displayed and works as expected.
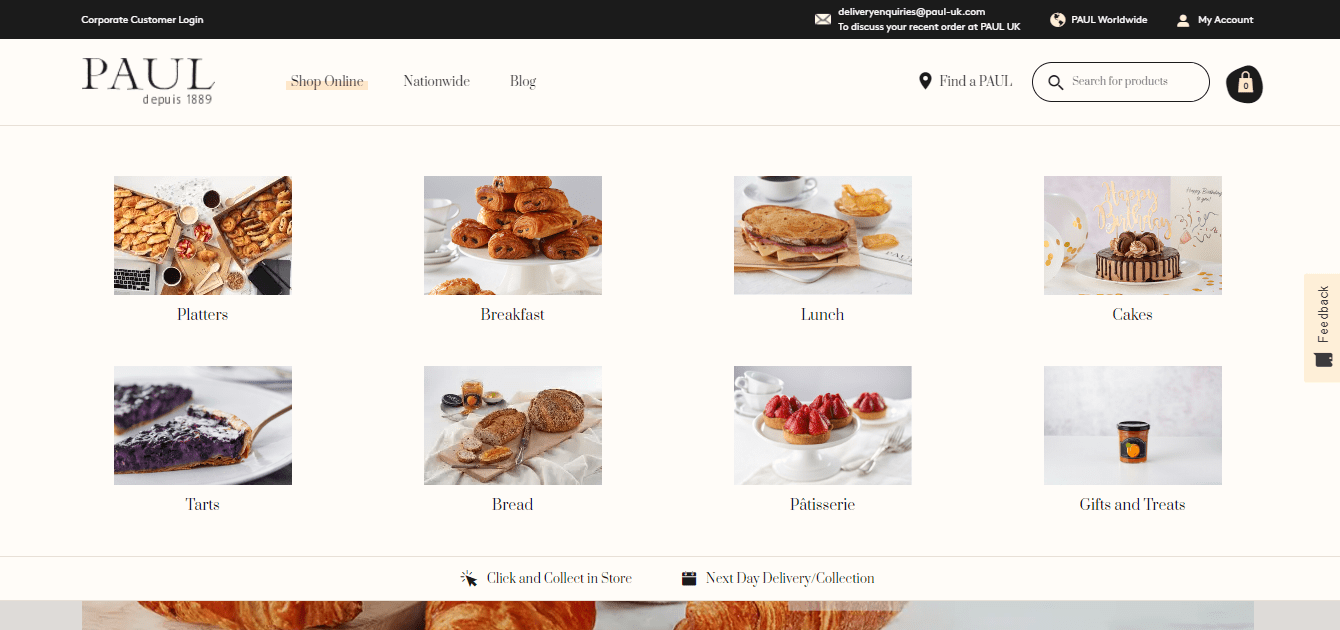
Homepage & Navigation (Paul UK)
#3 Category Page/Product Listing Page (PLP)
Go to the category page. Check the following things:
- ✓ page elements are displayed according to the design;
- ✓ products assigned to a category are displayed (except Out of Stock products);
- ✓ products are displayed correctly (images, prices);
- ✓ all specified filters are displayed in the layered navigation (provided that the category contains products with attributes that match the filters);
- ✓ filtering the webpage by one or more filters;
- ✓ deselecting of filtering;
- ✓ sorting;
- ✓ pagination;
- ✓ Grid and List views display.

Sorting on the Category Page (Paul UK)
#4 Product Details Page (PDP)
If there are several types of products on your website, carry out a check for each of them.
Go to the product page and check:
- ✓ all elements are displayed correctly;
- ✓ images gallery is available, while all images are available for viewing and zooming;
- ✓ prices display;
- ✓ options for Configurable Products are displayed and can be selected;
- ✓ option to change a quantity;
- ✓ adding the selected quantity of the product with the selected options to the cart;
- ✓ option to submit a review;
- ✓ Related Products and Up-Sells carousels.
#5 Adding a Product to Cart
Test that you can add a product to your cart on the following pages:
- ✓ Product Listing Page (PLP);
- ✓ Product Details Page (PDP);
- ✓ Wishlist (for logged-in users);
- ✓ Related Products, Up-Sell, Cross-Sell sections.
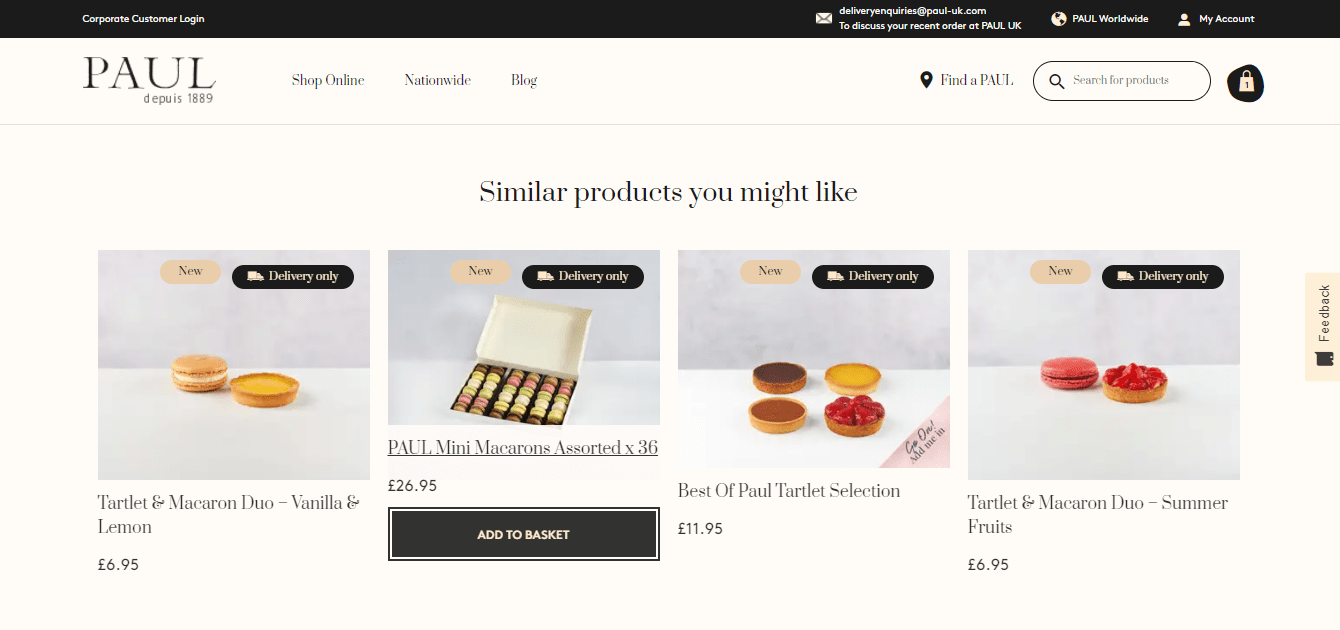
Similar/Related Products (Paul UK)
If options are not displayed for configurable products in the listed sections, then Add to Cart button will redirect users to the product details page (PDP).
Then a ‘Please select product options’ message displays. Users can add a product to the cart on PDP after they select options.
You should also check the merging of the carts of a guest and registered user:
- ✓ login to the website and add the product to the cart;
- ✓ log out;
- ✓ add one or more products to your cart as a guest;
- ✓ log in again.
The cart should contain products added by both a logged-in user and a guest.
#6 Shopping Cart Page and Mini Сart
After adding a product to the cart, check its display in the mini cart in the Header and Shopping Cart Page. The result should be the following:
- ✓ Product Image is displayed;
- ✓ Product Image and Product Name are clickable and redirect users to the PDP;
- ✓ the correct product quantity is displayed;
- ✓ the correct price is displayed (if the product has a discount, then the discount price is displayed), and the product price (if the quantity is more than one).
Check the functionality of the Mini-Cart and Shopping Cart Page:
- ✓ Editing a product;
- ✓ Removing a product;
- ✓ Going to checkout;
- ✓ Displaying totals;
- ✓ Opening Mini-Cart under the hover or by clicking on the cart icon in the header (depending on the theme);
- ✓ View and Edit Cart link.
Check the proper work on the Cart Page:
- ✓ Update cart buttons;
- ✓ Move to Wishlist functions;
- ✓ Gift Option adding;
- ✓ Estimated Shipping and Tax sections;
- ✓ Cross-Sell carousel.
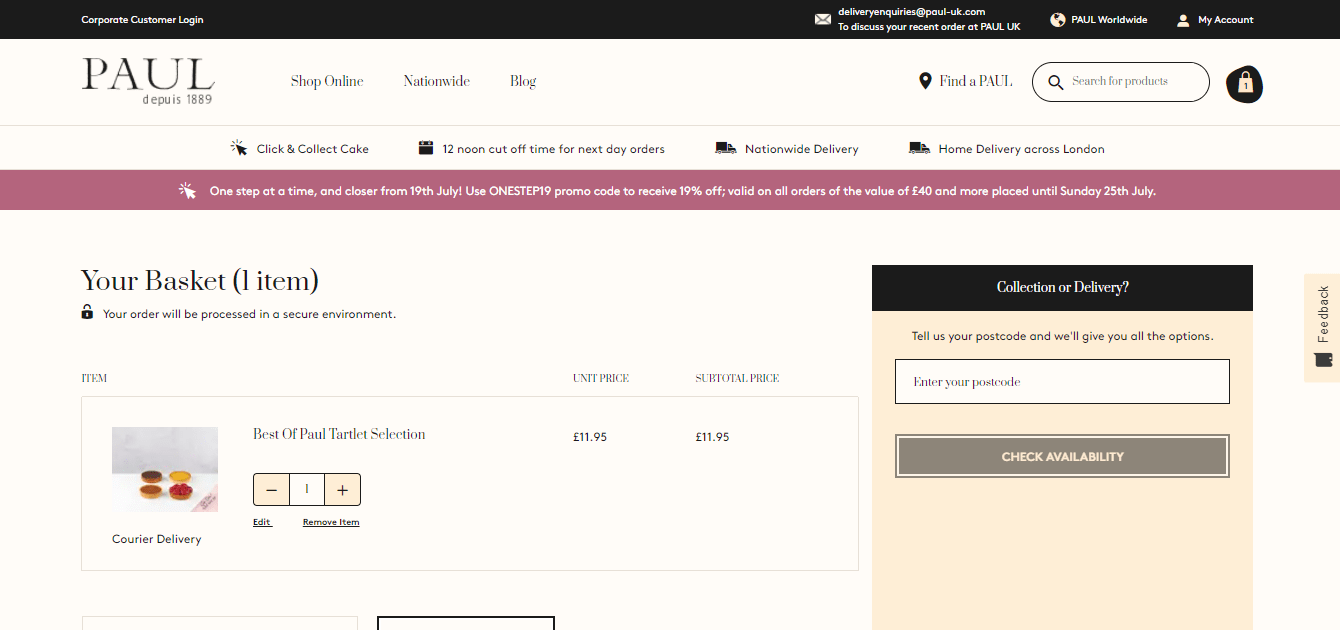
Shopping Cart Page (Paul UK)
#7 Checkout
It might be completed:
- ✓ as a guest;
- ✓ as a registered user;
- ✓ with the Login to checkout.
Shipping Step of the Checkout
There are four scenarios to test a shipping address:
- 1. Guest. The delivery address should be added at the first checkout step.
- 2. Registered user who doesn’t have stored addresses in the Address Book. In this case, the address added on the checkout should be saved to the address book after the order is completed as default Billing and Shipping Addresses.
- 3. Registered user with several stored addresses. At the first step of the checkout, all addresses should be displayed. The default shipping address is preselected when a user goes to checkout. There’s an option to choose any of the addresses.
- 4. Registered user with a saved address. Check the Add New Address function on the checkout. If the Save to Address Book checkbox is checked, this address should be saved in your personal account after completing the purchase.
In the Shipping Methods section, check that:
- ✓ shipping methods specified in the Admin Panel are displayed on the checkout;
- ✓ every time you add/change a shipping address, shipping options and costs are changed according to the specified address;
- ✓ users can choose the shipping method.
Also, make sure that the Order Summary is displayed correctly.
Check the checkout separately for the case when the cart contains only a virtual product (for example, a virtual gift card). The Shipping Step should be skipped when going to the checkout, and a user goes directly to the next step.
Review & Payments Step of the Checkout
Make sure that:
- ✓ all the Payment Methods connected to the Admin Panel are available at checkout;
- ✓ you can create an order using each Payment Method;
- ✓ there’s an option to change a Billing Address;
- ✓ Order Summary is displayed correctly;
- ✓ you can click the Place Order Button.
Check if the Success Page is displayed correctly.
After creating an order on the storefront, you need to perform all the stock checks and display an order in the Admin Panel described earlier.
#8 Cart Price Rules
Create a Cart Price Rule with coupon code and check if the coupon application works on the storefront. Discount code can be added:
- ✓ On the Shopping Cart webpage;
- ✓ On the Billing Step of the Checkout.
Make sure that the discount appears in the Shopping Cart Totals and Checkout Totals.
#9 User Account
Check the registration on the website and make sure that you can log in using the details provided during registration.
Check out the option to log out and then check the password recovery function.
- ✓ Click Forgot your password? on the login page;
- ✓ Enter your e-mail address and submit the form;
- ✓ Open the received e-mail and follow the link to set a new password;
- ✓ Set new password;
- ✓ Login with a new password.
Check All Sections of User Account
Account Dashboard:
- ✓ brief information about a user should be displayed here;
- ✓ all links are properly working and redirect to the particular web pages.
My Orders:
- ✓ all orders created by a user are displayed in this section;
- ✓ there’s an option to view Order Details by clicking on the View Order link;
- ✓ there’s an option to add items from an order to the cart by clicking on the Reorder link.
My Wishlist:
- ✓ an empty Wishlist is displayed correctly;
- ✓ Wishlist with products is displayed correctly;
- ✓ user can edit the contents of the Wishlist;
- ✓ user can add products to the cart;
- ✓ Share Wishlist function works correctly.
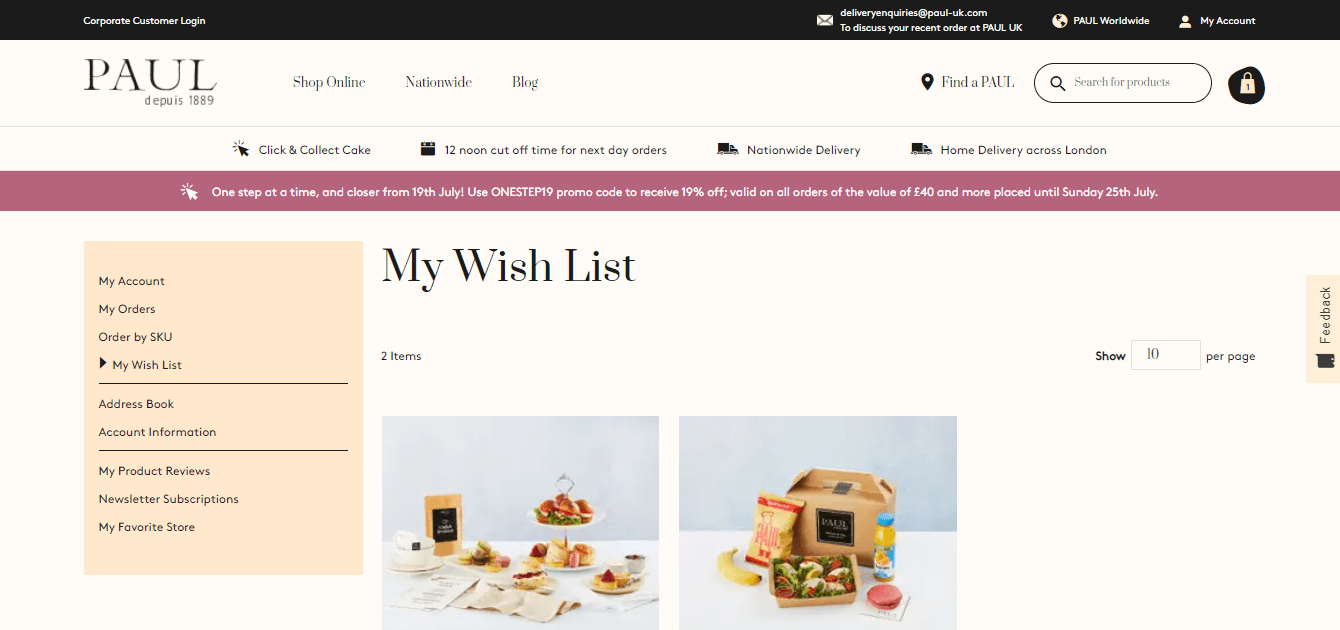
My Wishlist (Paul UK)
Address Book:
- ✓ displaying an empty Address Book;
- ✓ displaying the Address Book with the Default and Additional Addresses saved;
- ✓ there’s an option to add, edit, change addresses.
Account Information:
- ✓ editing Account Information;
- ✓ changing an e-mail address and password.
My Product Reviews:
- ✓ all user reviews are displayed correctly;
- ✓ going directly to the review by clicking on it.
Newsletter Subscription:
- ✓ subscribing and unsubscribing to news.
Check the rest of the My Account sections according to your initial website requirements.
#10 Search
Search Suggestions Dropdown should appear when entering a search query in the Search field (unless otherwise provided).
Check your search for different keywords:
- ✓ Full Product Name;
- ✓ Partial Product Name;
- ✓ Keywords;
- ✓ SKU;
- ✓ Brand name;
- ✓ Category name.
Checking the search results page is carried out the same way as checking the category pages (PLP) if you don’t use search modules with their own template for the results pages.

Search (Paul UK)
#11 Forms Validation
As a rule, the following types of validation are used by default:
- ✓ completeness of required fields;
- ✓ e-mail address format;
- ✓ zip code, which depends on the selected country.
List of forms:
- ✓ Create a New Account;
- ✓ Login;
- ✓ Forgot password;
- ✓ Set New Password;
- ✓ Account Information;
- ✓ Add New Address in Address Book;
- ✓ Add New Address on Shipping step of checkout;
- ✓ Add New Address on Payment & Review step of checkout;
- ✓ Share Wishlist;
- ✓ Add Product Review on Product Details Page (PDP);
- ✓ Contact Form;
- ✓ E-mail Subscription.
#12 E-mail Templates
The forms detailed above are recommended to be carried out using a real e-mail address to check E-mail Templates instantly.
Here’s a list of templates you’d better test:
- ✓ New User Created;
- ✓ Password Reset e-mail;
- ✓ Order Confirmation;
- ✓ Invoice;
- ✓ Shipping;
- ✓ Credit Memo;
- ✓ Newsletter Subscription/Unsubscription;
- ✓ Shared Wishlist.
#13 Other Pages
Check the display of CMS and 404 pages.
Conclusion
You can find even more helpful information on testing in the official Magento DevDocs documentation.
If you don’t have time to understand all the ins and outs of website testing, simplify your life and reach out to proficient Magento developers and QA engineers to receive professional help.
We sincerely thank our QA Engineer, Marina, for preparing this article.
Concerned about the quality of your eCommerce store?
Leaving your contact information guarantees a timely help from us


