Prelaunch Checklist for Magento 2 Online Store
You built your online store using Magento 2, and you are days away from introducing it to the entire world and your customers in particular.
You did it! You built your online store using Magento 2, and you are days away from introducing it to the entire world and your customers in particular. And, maybe we’re not wrong in assuming that you want to avoid (or at least try to) all possible errors and inconveniences on D day, or any other day for that matter!
Before the launch, the first thing you should do is define what and how the site should be tested. In other words, you need to create a prelaunch checklist for your Magento 2 online store that, in essence, won’t differ much from the Magento 1x but still has some key differences. If you’re not sure where to start, here is some food for thought.
The most important points you should pay attention to are:
- Make sure that the website loads quickly and as planned
- Assure your customers that payments are always processed in a secure fashion
- Make sure that all the system settings are configured properly, and your website configurations are optimally in place
- Make sure that the trading functionalities work as expected (prices, taxes, inventories, shipping and payment methods etc.), so your sales are processed safely and accurately
- Make sure your website is noticeable to the world by optimizing it for search engines, and that options like Google Analytics and Google AdWords are embedded
- Prepare welcome and confirmation emails, newsletters, discounts, and promotions for your customers to get started.
Now that we’ve created and defined a rough checklist for our e-commerce website, what exactly should we do to insure that everything we have done, was done properly? Let’s take a closer look at these nuts and bolts step-by-step!
1. Security
Make your Magento 2 store secure with an SSL certificate. Everyone who is going to make purchases via the Internet, wants to be sure that their money will get to the seller safely. Also, for the customer, it is very important for them to know that their credit card information is safe and inaccessible to third party resources or hackers.
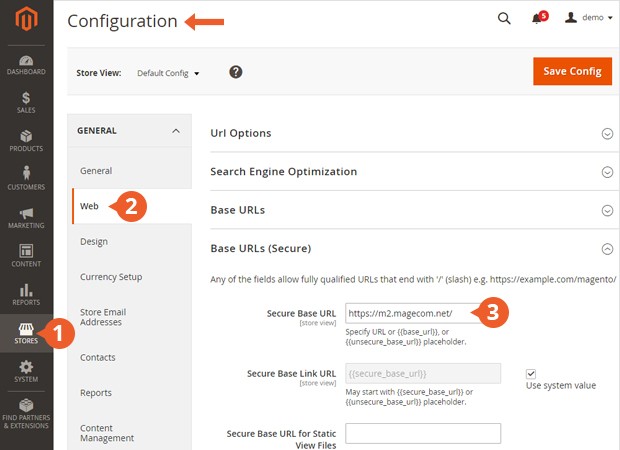
For these reasons, Magento needs a security certificate to keep your customers safe from criminals. After installing this technology, all of the customer’s data will go through this software, making it nearly impossible for hackers who want to steal or access your customer’s private information.
You can make secure links visible on the front-end and in Admin by setting the following ‘Yes’ values.
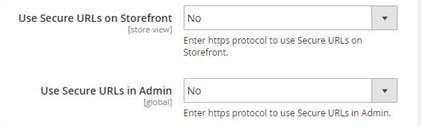
And, do not forget to change all the passwords (for the admin panel, database etc.) to more secure ones if you haven’t done it already for your development site.
2. Correct URLs
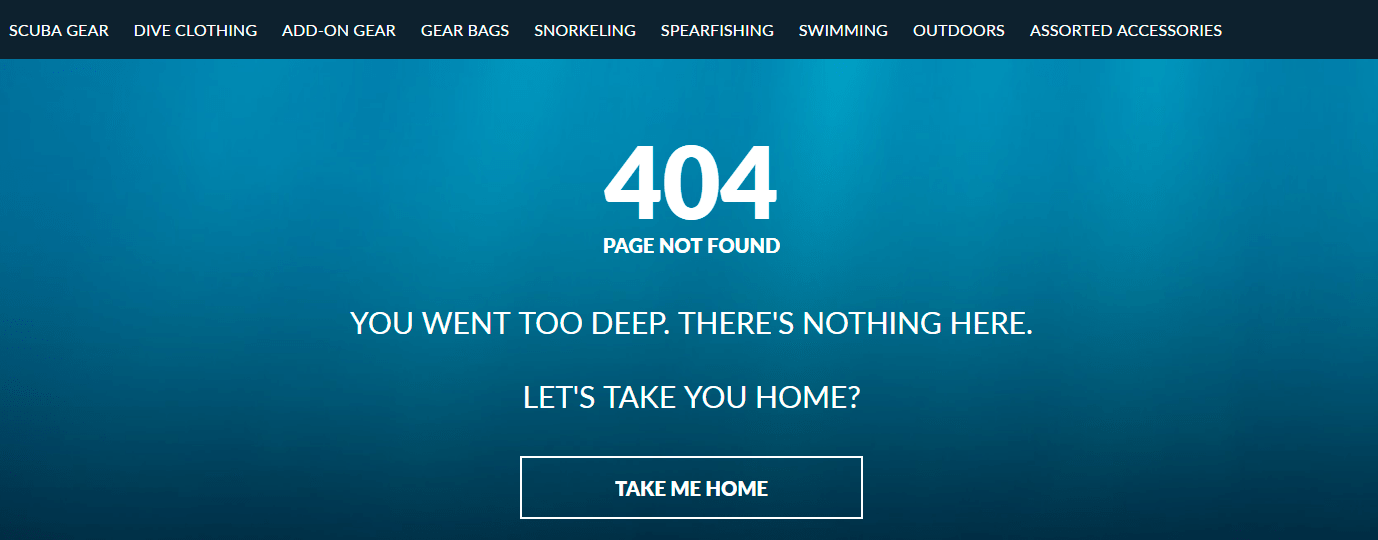
Landing on an Error 404 message page is basically not the worst thing that could happen to a shopper, but frustrating for sure. And even more unpleasant and frustrating when you land on several dead pages one after the other. If this happens, it’s unlikely you’ll ever see customer again. So, what is our task? Make sure we don’t have any dead ends. We should check these things:
- Every URL has a correct address
- Frontend and backend have a precise and functioning URL
- Whether the URLs have www in front of them or not
- All of the media URLs change from localhost/media to your domain/media.
By the way, if you discover that you have not created a 404 page at all – just do it. Spice the message with some humor and help shoppers out to find what they want with some suggestions. A great example of 404 page implementation you can find on Dipndive website.
3. Correct store information
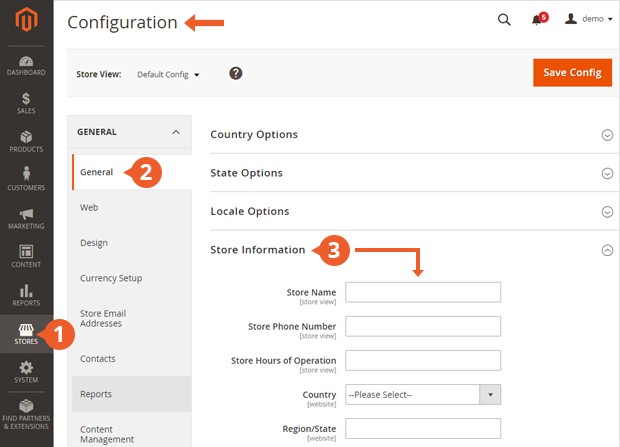
Your customers should always know where they are and what company, content, and material they’re dealing with. With this in mind, you should always provide this information as accurately as possible by entering the correct Store Information. You can update your store information in System > Configuration > General > Store Information.
You can also change the Email addresses which your customers will see in the emails and marketing materials from your store by going to System > Configuration > Store Email Addresses.
And, do not forget to specify metadata for your homepage to help search engines validate your site and show it to the right shoppers. You can add microdata in the Content area: Content > Pages > Home Page > Search Engines Optimization.
4. Configure the email sending and templates
Since we’re talking about emails, we shouldn’t forget to configure email sending and email templates. As a customer, it’s nice to receive a welcoming registration letter from a new website and know that you’ve completed the registration correctly. Or receive confirmation email with your rewards info, the order confirmation, or out of stock notifications etc. If you want the emails to be sent automatically, they should be configured via cron, so, don’t forget to add it to your checklist.
It is also important to brand the email templates to best represent your website design and brand. This way, it shows you’re serious about your work and your attitude towards your clients. In other words, these letters directly correlate to the face of your business, make sure it’s a bright, cheerful face, not a sad empty one. Magento offers you great options in this terms: you can use one of 30+ default email templates as well as add and configure your own. If you decide to use any 3rd party service like MailChimp, then you have to check that system as well.
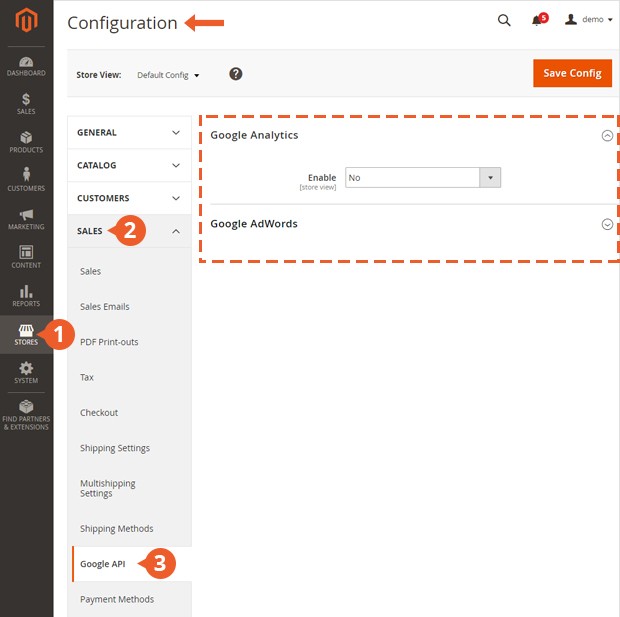
5. Google Analytics settings
Magento 2 is integrated with Google API to allow your business to use Google Analytics or Google AdWords. All you need to do is setup your Google Analytics account and enter its number in Stores > Configuration > Sales > Google API > Google Analytics and then check the functions to make sure everything is up and running.
6. Checking the main online store functions
Checkout. Finally we come to the most important thing – check out process; It’s a key functionality of any Magento website because without the cash flow, there’s not much of a point to anything else. Before the launch, you should decide what checkout options you want to enable – onepage checkout, guest checkout etc. All these settings can be configured in the Stores > Configuration > Sales section.
Inventory. Inventory can quickly make or break any business. Not enough stock and you won’t be able to compete with the others. That’s why you’re better off measuring twice and cutting once when it comes to stock, otherwise it could turn into a disaster once the website is up and running. It’s crucial to make sure the quantity of products in stock is enough before going live.
Cart. You should check the configuration of cart settings and functionalities, and be able to add, edit, and remove products from the cart with ease, all while the total amount of purchase is calculated correctly.
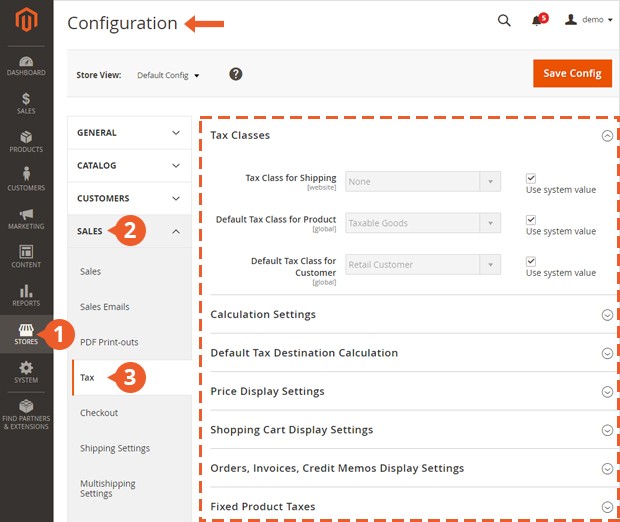
Taxes. A crucial tip: tax percentage has to be configured according to the government rules for your country or state. If you don’t set these rules correctly, your customers will get wrong prices on their orders and even face criminal penalties, and no one wants to end up in the slammer to save a few bucks on a new set of kicks.
Shipping. Customers should have a set of shipping options to choose from that works best for them. You should provide them with several shipping methods, configure them correctly and obviously don’t make available the methods which you do not offer/use.
Payment. Before launching your site, you should make sure that the payment methods you want to offer to your customers are enabled and configured correctly, and all the financial transactions are properly in place- the purchase amount will be withdrawn from the customer side, the seller will receive their share of the sale, and the payment system correctly computes the fee amount. It is also important to disable some of the default Magento payment methods such as free shipping or check money order, if they are not planned within your sales strategy.
7. Checking custom extensions
If you have bought or developed extensions for your Magento 2 store, it’s a good idea to make sure that they’re working correctly. As a rule, the extensions are supplied with detailed guides, or your Magento developers can provide you with this kind of documentation. A lot of extensions you buy are bound to certain domain names, that’s why before you go live, check that the right domain names are specified for those extensions. In some cases, extensions have test and live modes, and you will also need to switch to live mode and enter valid data (e.g. API user, merchant account etc.)
8. Prelaunch tuning of Magento 2 system
Once you’ve checked all the system settings and basic functionalities, you should prepare your system for launch on the live server. This process includes several simple but important items.
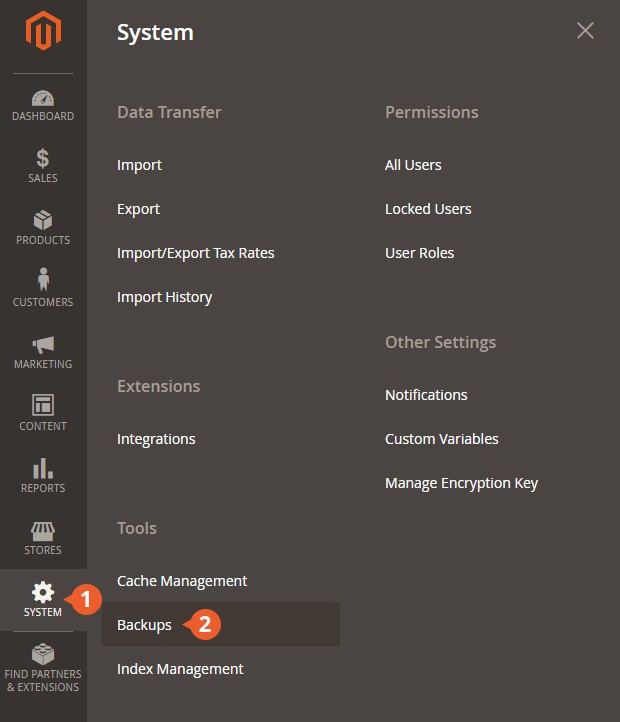
Creating a database backup. We hope it won’t be the case, but it’s Murphy’s law that if something can go wrong, it will when you least expect it. In this case you should create a backup in order to go back to a previous state of the system that did work properly and “restore the store.”
Clearing test data. You should ensure that after your products, prices, and other info have been imported, your test data is removed from the system. It can be test products, prices, shipping and payment settings, customers, orders etc. but keeping it around isn’t a great idea, just to avoid any unnecessary mishaps.
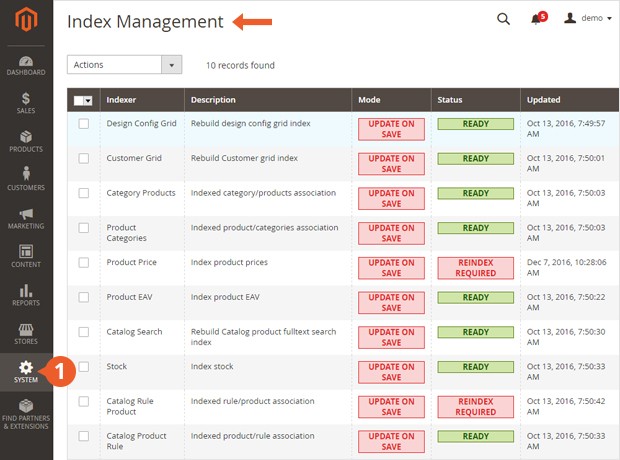
Index Management. After clearing test data and importing live data, you should ensure that your catalogs are functioning properly after migration. You’ll also need to re-index the data to make sure your changes show up in the front-end but it’s simple, and you can do this by going to System > Index Management
Usually it’s easy to see which items need to be re-indexed.
Enabling Caching. Usually caching is disabled at the very beginning of developing. Once done, you must remember to re-enable caching again and refresh it when you are prepared for showtime. You can do this by going to System > Cache Management.

Sitemap. You should also make sure that the sitemap for your website meets the most basic requirements and that it shows the real picture of what your site looks like.
If you went through all these checks, made all the needed changes and are satisfied with what you’ve done to the staging site, it’s time to go live. But if you have any doubts, concerns, or feel like something is missing, give us a call and we’ll help you out in any way that we can.
Hunting for Magento development support?
We’ll be in touch soon if you leave your contact information


