Under the Hood of Magento Order Management & Extensions
If you deliver orders properly, customers are likely to purchase from you over and over again. Make sure that everything works as expected.
Everything from order organization, smooth shipping process, keeping customers in the loop about their order status, getting refunds if necessary, etc., has to be organized logically and as smoothly as possible. In this term, Magento is a good solution: all the processes are well-thought and harmonized. Even when there is something that a system lacks but needs, it is easy to change through additional configuration or Magento development.
In this article, we’ll try to cover default order management tools in Magento 2 to help make sure you get the most out of what your store has to offer, and the very first thing we would like to start with is the general order management workflow, let’s take a closer look here.
Order Management Workflow
To get a visual understanding of what it looks like, the quick-look diagram below should help describe what we need to know. It may look a little complex, but we’ll explain how each step of the process works, so don’t go running for the hills just yet.
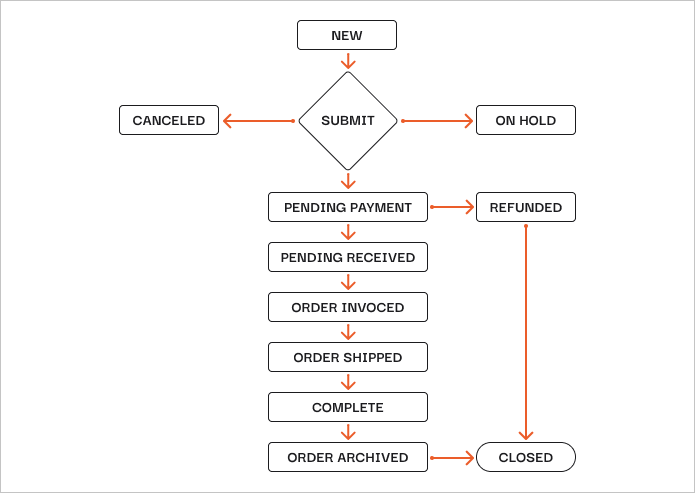
1. Placing orders. New Orders in Magento 2 create when the customer clicks on the Checkout button – no additional activities are required from Magento store admins.
2. Order Status. After a new order is created, it is put in a “Pending” status enabling both customers and admins to cancel this order at any time. A customer may cancel because of an accidental purchase or a change of heart. An admin may need to cancel the order if there are no products left to sell, manufacturer issues where products need to be sent back, and the list goes on.
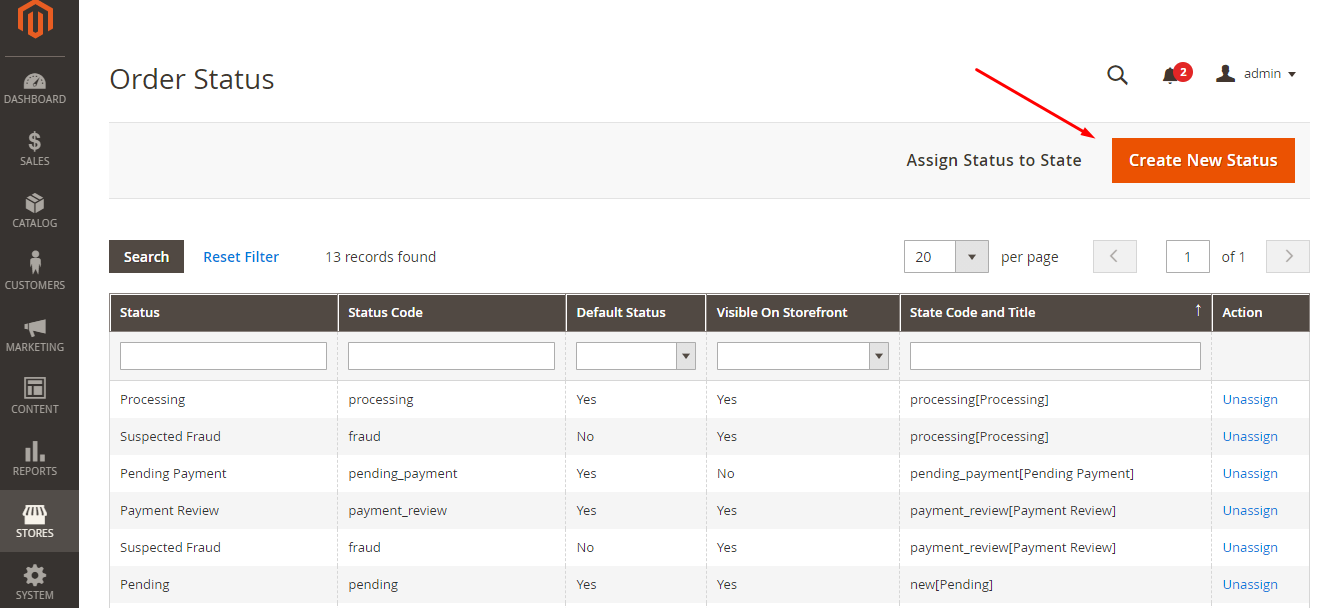
And rather than setting a workflow status to just “pending,” there is a range of other default statuses you can use at various stages of your order workflow. Here they are:
New: This status shows that an order was created, but payment hasn’t been made yet.
Pending: This status indicates that the invoice hasn’t been created yet, and shipping hasn’t occurred yet.
Processing: This means that an order has already been invoiced or shipped. Note that it has to be either invoiced or shipped, but not both, as we’ll see here below.
Complete: In contradiction to Processing status, this status appears when an order has been invoiced and shipped.
Canceled: This status can be assigned by either the website owner or a payment gateway if this order wasn’t paid for.
Closed: This status means a credit memo was assigned to an order, and the customer received a refund.
In case the existing ones aren’t enough for your business, Magento enables you to add your own custom order statuses to the workflow. So, let’s take a closer look at how we can do it:
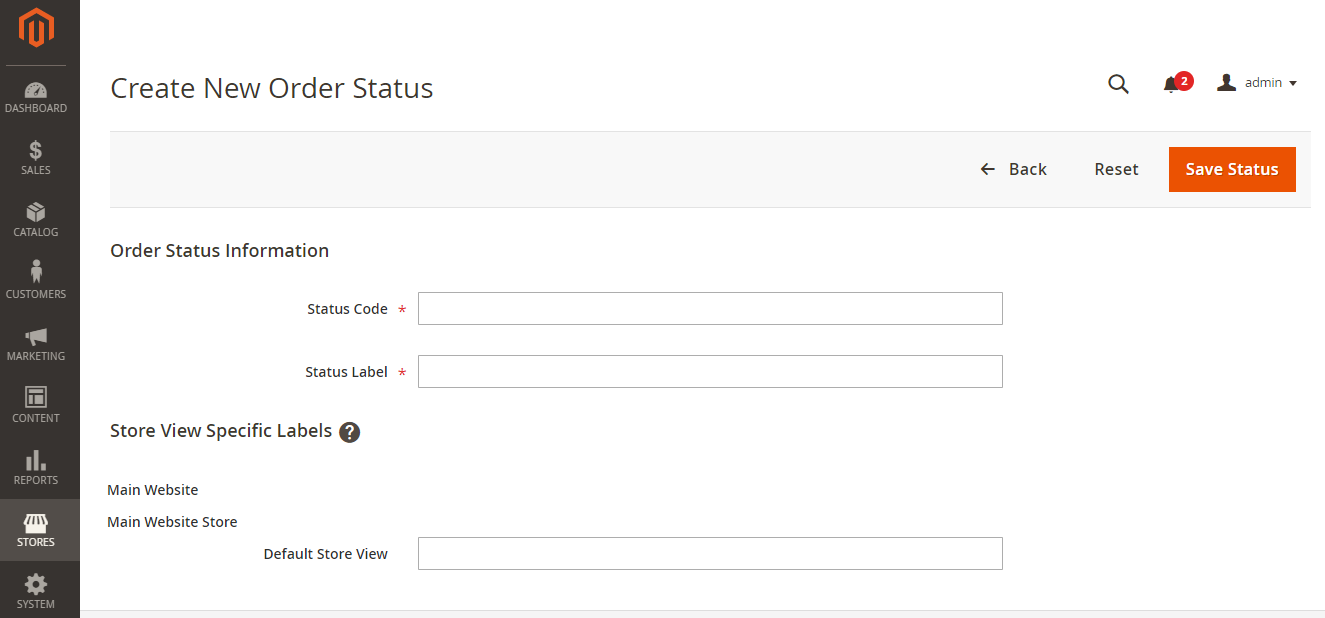
Go to Stores -> Order Status

Select “Create New Status” button

Under the “Create New Order Status” section, the first thing you’ll need to do is enter a Status code and Status Label.
A Status Code has to contain both letters and numbers, and it’s required to start with letters. Also, keep in mind that underscores are used in place of spaces.
A Status Label is the status name that is visible on the front end of your online store. This is the side that the customer will be able to see.
If you have multiple stores, the Store View Specific Labels section may come in handy because it allows you to set different labels for each of your store views.
The last step is to click the Save Status button.
3. Invoice Creation. As soon as payment has been made by a credit card and is received by the website owners, an invoice for a new transaction is automatically generated. In contrast to credit card payments, if payment is made via bank transfer or by check/money order, an invoice has to be created manually by the website admin. Then, after the invoice is completed and submitted, the customer gets an email with the invoice copy.
4. Shipping details. At this stage, your customers are nearly done with the purchasing process. Once they choose a shipping method that works for them and select submit, they’re good to go. From the Admin side, the only things left to do are print a packing slip and shipping label and inform the customer that their order is on its way.
One more essential thing to mention here is shipping to multiple addresses. As the name suggests, this option enables your customers to ship their orders to multiple addresses during checkout. From the admin side, you’re able to set the max number of addresses one order can be sent to. To enable multi shipping and determine the number of addresses you need to take the following steps:
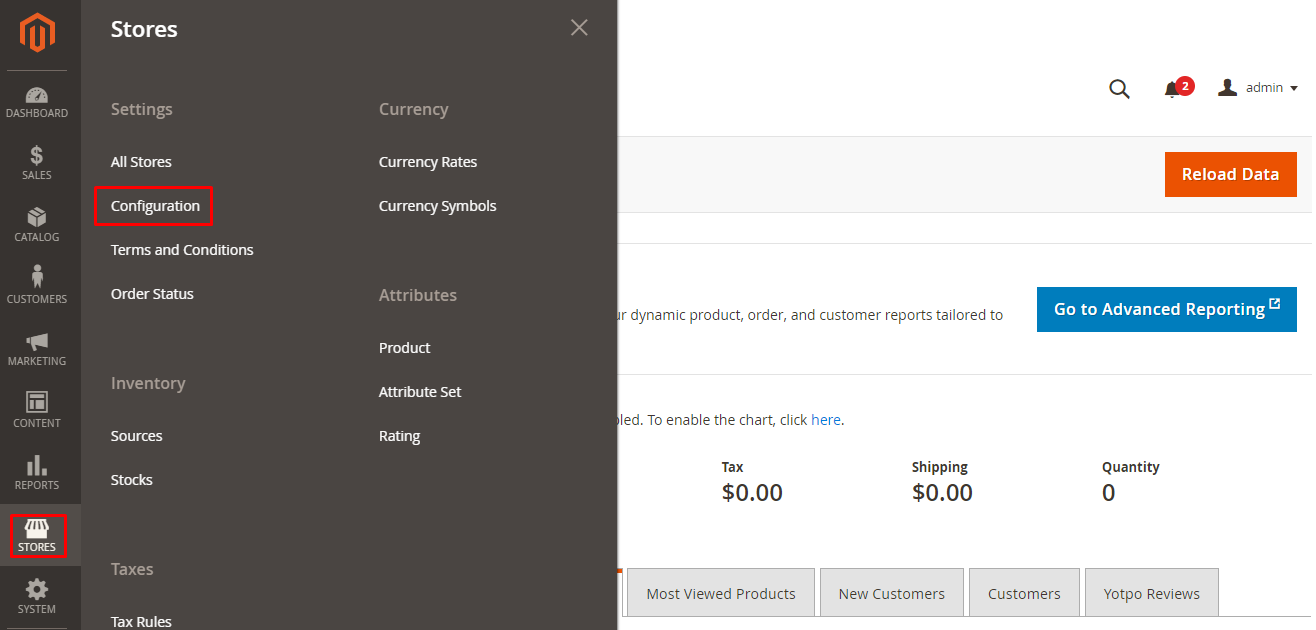
On the admin, sidebar go to Stores -> Configuration.

Under the Sales, section chooses Multishipping Settings.

In the Options sections, you will see two settings: Allow Shipping to Multiple Addresses and Maximum Qty Allowed for Shipping to Multiple Addresses. The first option is a simple yes or no option, while the second option allows you to choose the number of destinations you’d like to include.
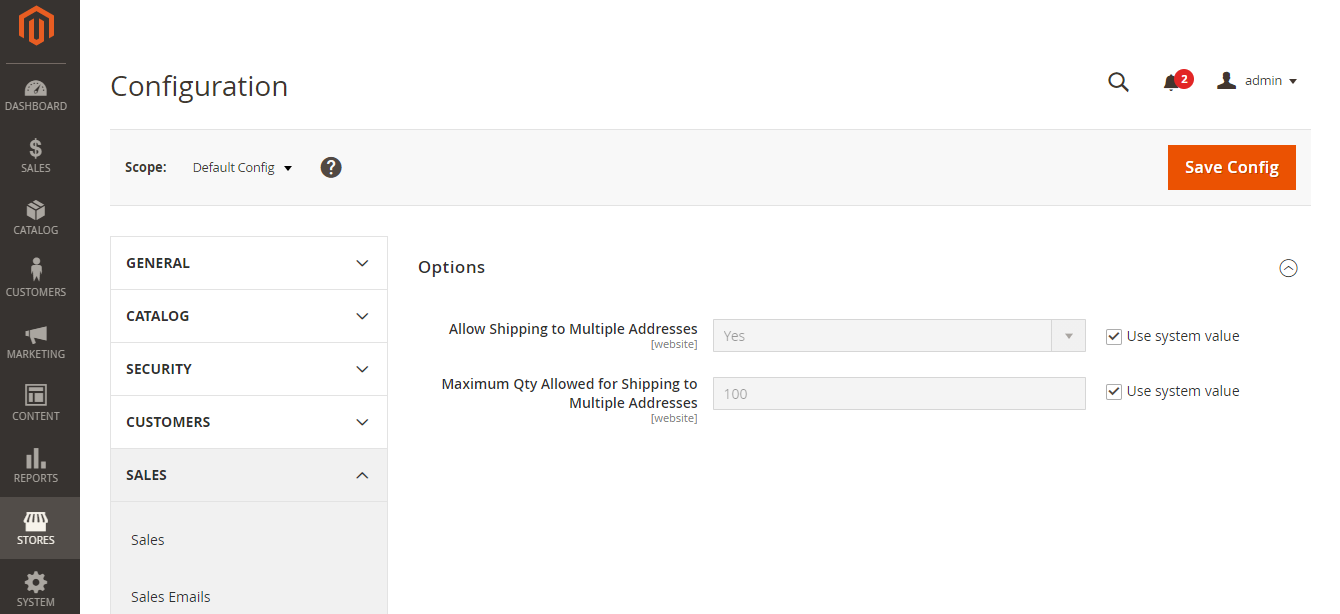
After modifying this section, click the Save Config button, and you’re good to go.
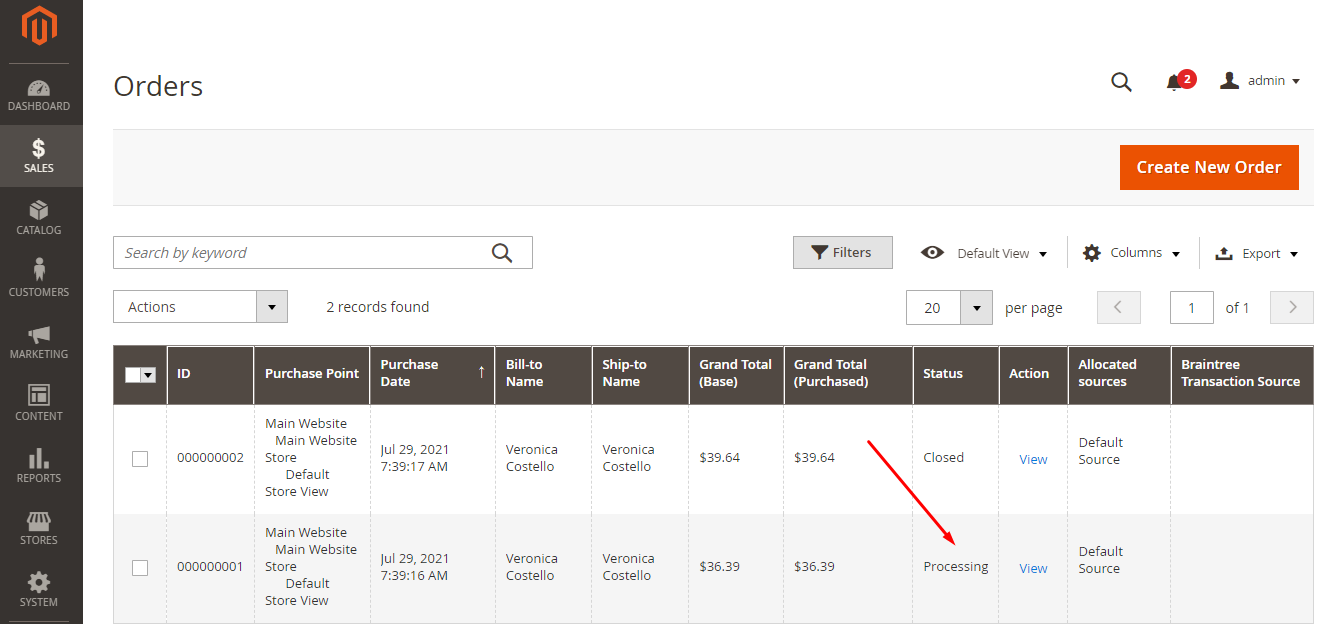
5. Last but not least is the stage of Order tracking. In Magento 2, you can track any order status by doing the following:
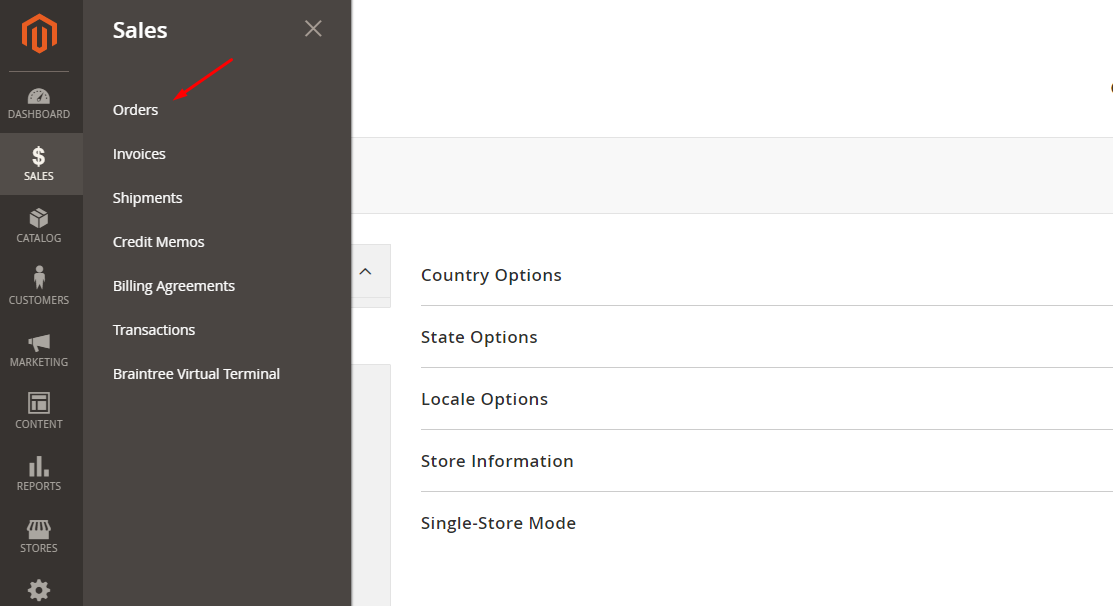
Go to Sales -> Orders on the sidebar.

Then you need to find the order you want to track in the list, and the Status column shows you the order status. Pending orders can be changed to On Hold, Cancelled, Invoiced, and Shipped.
Magento 2 Order Settings
To configure checkout, shipping, and payment settings to meet your business needs, go to Stores -> Configuration -> Sales tab.
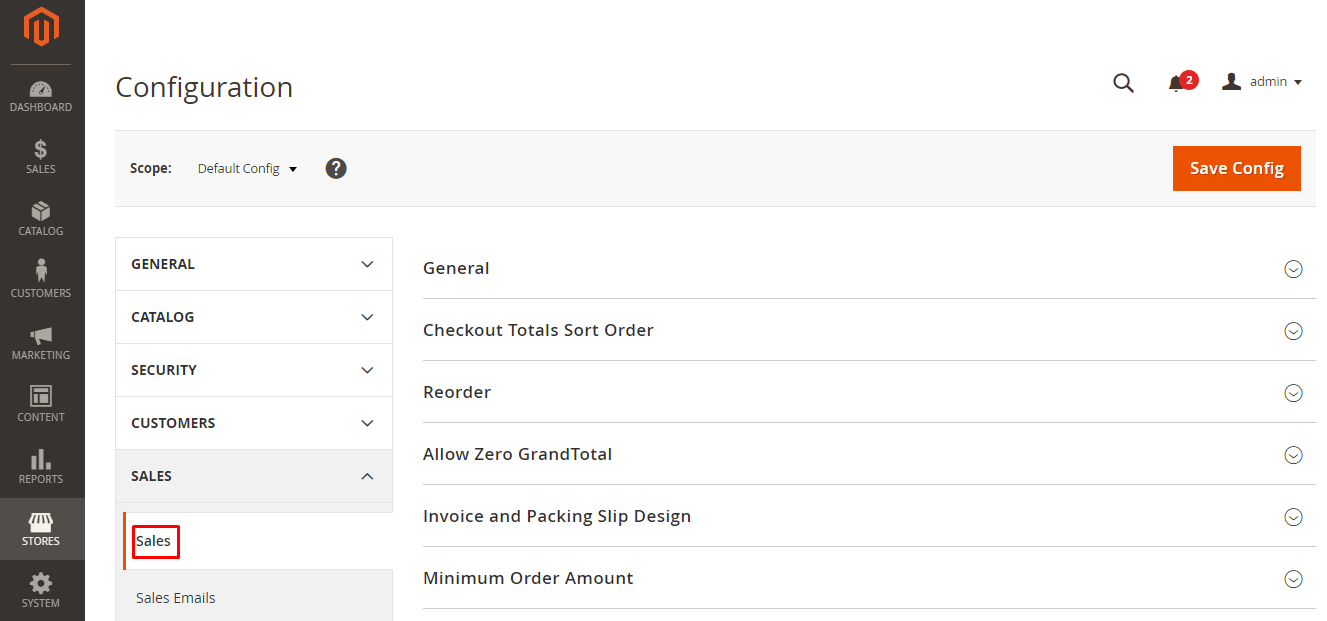
Let’s dive deeper into the settings you may find here and the functions they might help you with.
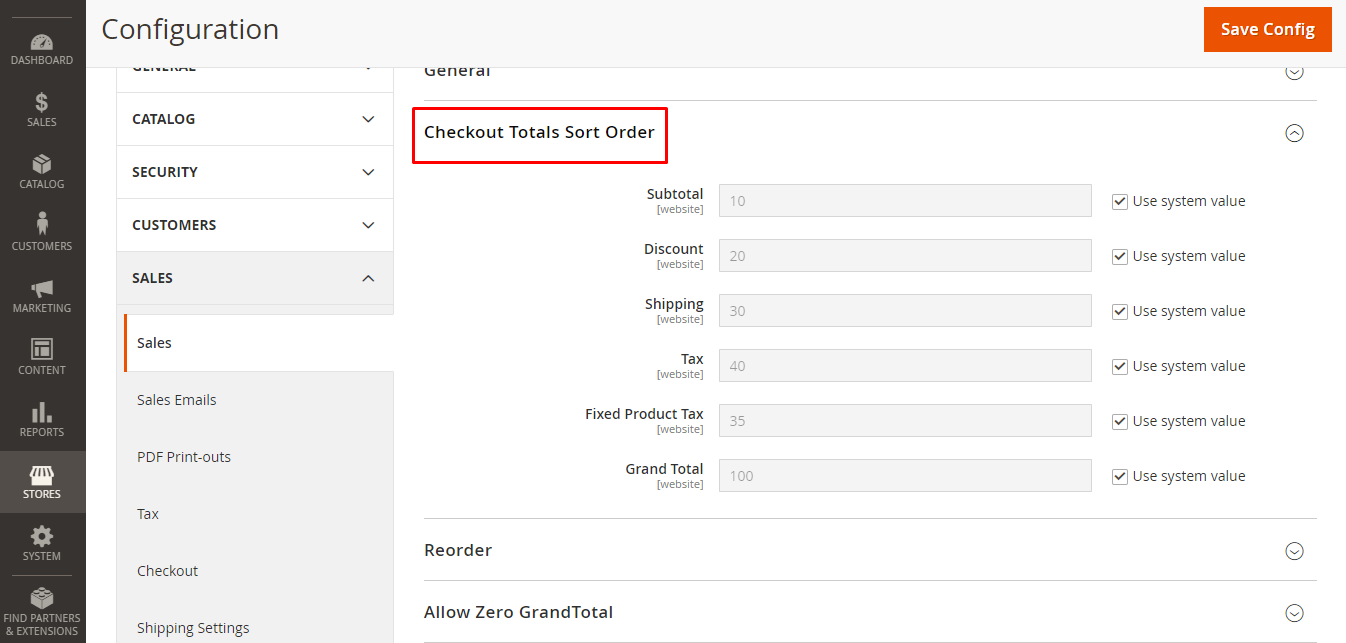
Checkout Totals Sort Order: This section allows you to determine the sequence of possible calculations like Subtotal, Discount, Tax, etc., during the order review stage. The first item to be sorted possesses a value of 10, whereas the last one will be 100. All the in-between things get discounts between 10 and 100.
Reorder: This section will be highlighted in more detail a bit later in our article.
Invoice and Packing Slip Design: Here, you can replace a default PDF invoice logo with your business logo. To do that, you just need to upload your marketing templates/files into the corresponding fields. You can also add your address to show it on packing slips and invoices that are processed automatically throughout the rest of the process.
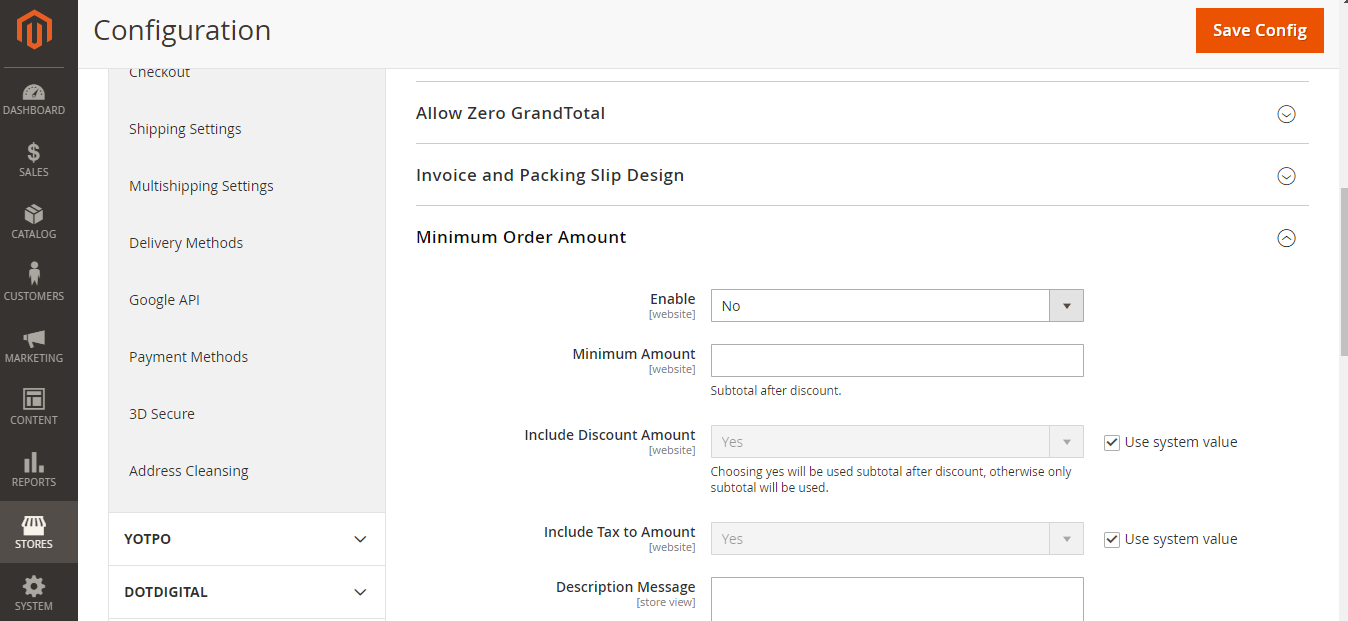
Minimum Order Amount: This is the place where you can set a minimum amount (after discounts have applied) that all the order subtotals have to reach. Those orders that have to be shipped to multiple addresses can get a requirement to go the minimum amount per each address, or not, depending upon your preference.
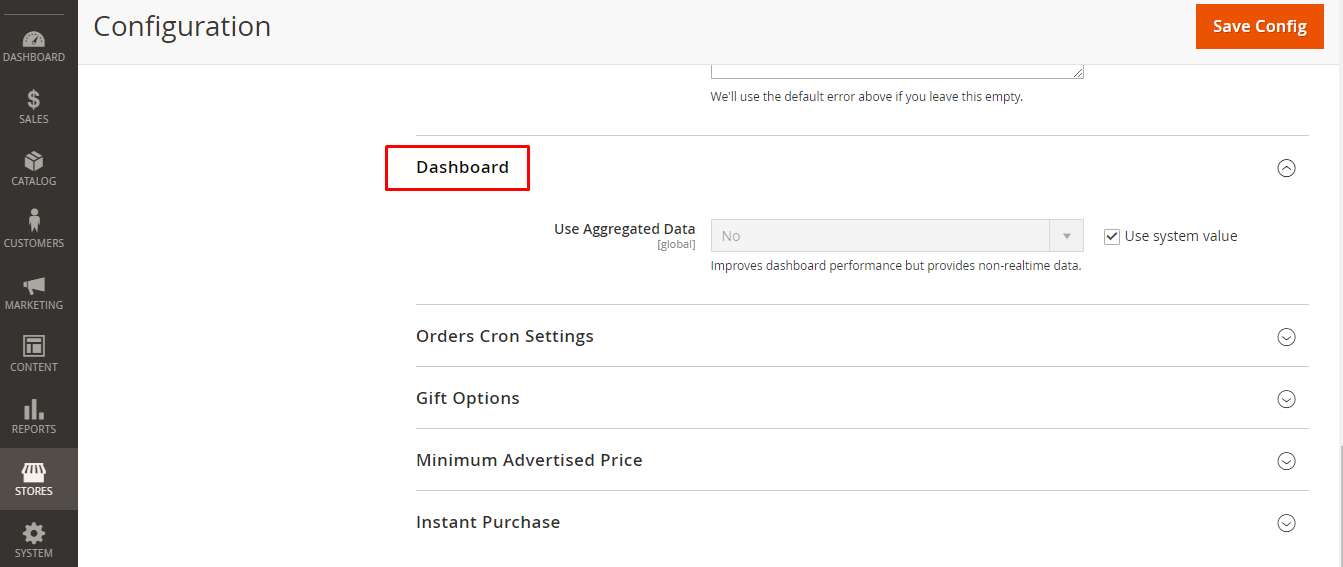
Dashboard: Gives the admin the ability to see if you are using real-time, aggregated sales data to generate dashboard snapshot reports. To save time and ensure the site’s smooth operation, you can disable the data transfer function.
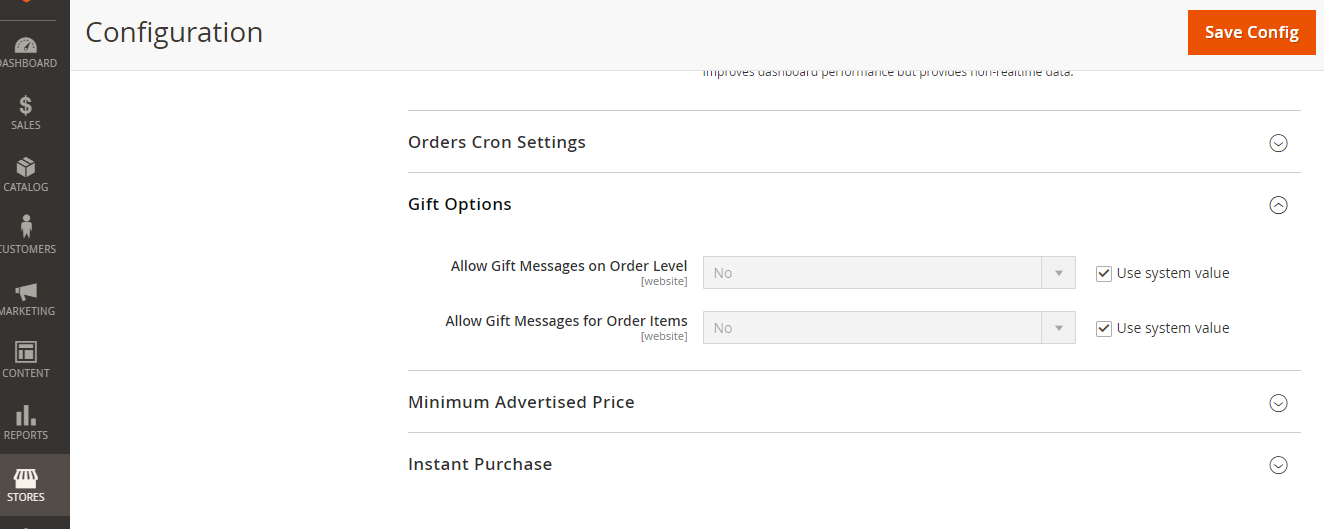
Gift Options: This configuration enables you to allow your clients to add a message to their orders. At the checkout stage, they can choose from two gift options available: Gift Options for Entire Orders and Gift Options for Individual Items. First, you have to configure these options for the whole website, and only then will you be able to apply them to the product level.
Minimum Advertised Price or MAP enables you to offer your customers a lower price than the manufacturer’s suggested retail price while not breaking compliance with these manufacturers. You can change your webstore configuration to hide your current price on those pages where it’s forbidden by the manufacturer’s conditions.

After you are done with all the necessary settings here, you can further follow our lead seems like a long process, but hopefully, most of it follows a simple logic that makes everything easy to apply and benefit from. On that note, let’s keep going.
Editing Orders
Magento 2 enables you to cancel and make re-orders based on already existing ones just by copying them. This means you’re able to update quantity, add coupons, change customer’s addresses and payment or shipping information.
One important thing to keep in mind is that there’s no ability to edit orders that have been invoiced by default by default. You also can’t delete orders in Magento 2. You can only set them to a “Cancelled” status. But don’t get upset. There are several Magento extensions that will come in handy if you need to edit and delete orders. For instance, Delete Orders and Order Eraser extensions are free of charge but can save you from storing manager of orders that need to be deleted. Moreover, these extensions allow you to delete not only an order itself but also its invoice, shipments, memos, etc., in just one simple click.
When it comes to editing orders, the Simplify Bulk Order Processing extension can be a lifesaver for you in avoiding opening each order and processing them individually. Using this extension, you can work with all your orders in bulk from the orders grid. Accordingly, the price is $129 and $259 for Community and Enterprise editions, so keep this in mind as your store grows and grows.
Making Reorders
Those orders that have already been completed can be reordered by your customers whenever they want them to. It only takes a couple of clicks in customer accounts to make quick reorders. In case you want to configure customer reorders, namely to enable them, just make a few changes here:
Step 1. Go to Stores -> Configuration on the left sidebar of the admin panel
Step 2. Expand SALES and choose Sales

Step 3. Expand Reorder on the right and choose Yes in the Allow Reorder field. And we’re done.

Making Refunds
An essential part of the shopping experience is making refunds if customers aren’t satisfied with your products. Not that this would ever happen to your store but, whoever said the customer is always right clearly didn’t work directly with the public.
To give money back in Magento 2 – you have to use Credit Memos. It sounds fancy and complicated, but it’s not and can be completed in the blink of an eye.
1. Go to Sales -> Orders and select an order you want to make a refund for
2. Click View and then select Credit Memo.

3. Scrolling down, you will see the Refund Totals section, where you can see three fields enabling you to set Shipping amounts to be refunded or any number more or less than what the customer paid. You can set this amount in the Adjustment Refund and Adjustment Fee fields correspondingly.
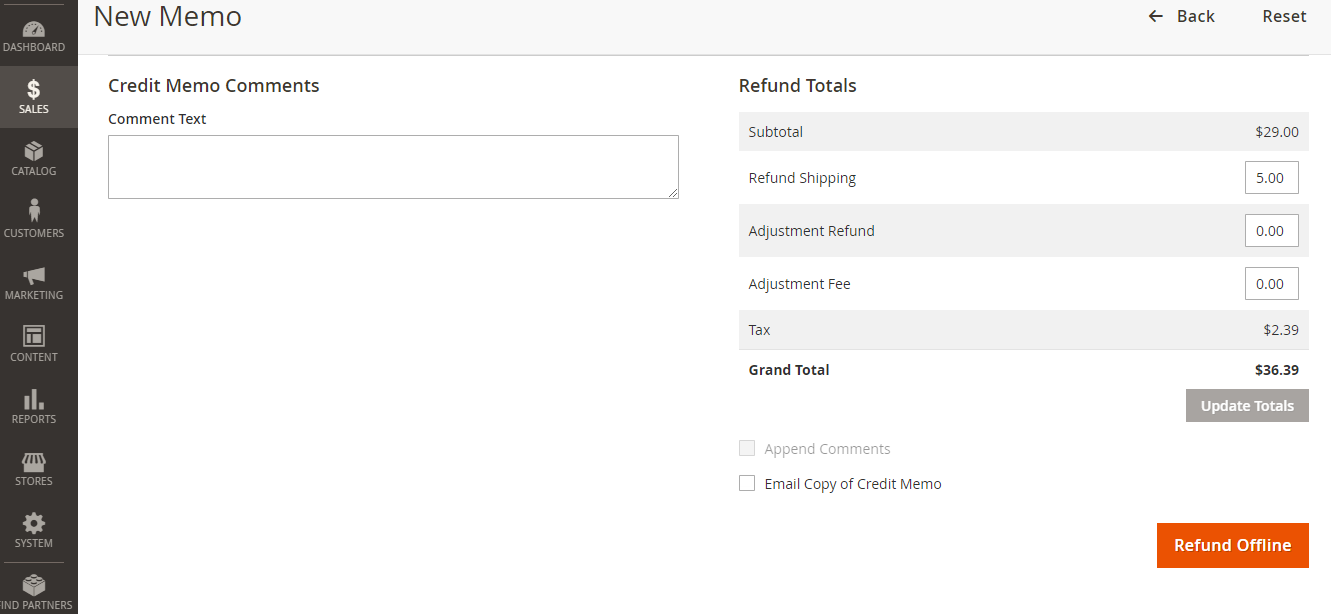
If you’d like to add a comment to a refund, – you just need to add it in the Comment Text field on the left side. Simply select the box Append Comments checkbox, and your message will be included with the refund.
And one last step is sending an email to your customer with a copy of the Credit Memo. To do that, you just need to select the Email Copy of Credit Memo checkbox, and they’ll receive the update along with the refund information.
Managing Backorders
Backorders make it possible for your customers to order products that aren’t currently in stock and receive them when they do arrive.
To enable this option in Magento 2, let’s take a look at the steps below:
1. Go to Stores -> Configuration, expand the Catalog section, and select the Inventory tab

2. In the Backorders drop-down, select one out of the three available options

No Backorders: As the name suggests, this option disables backorders for your store.
Allow Qty Below 0: This option enables the product to be displayed as In Stock even though its quantity is 0.
Allow Qty Below 0 and Notify Customer: This option does the same thing as the above option, but in addition to this, adds a corresponding message in the Shopping Cart.
After you’re done with this, click the Save Config button to apply the changes, and feel better knowing that you’ve increased your sense of reliability in the eyes of your customers. Or that you just need to order more inventory.
Creating Shipping Labels
Magento 2 enables you to create shipping labels for both new and existing orders with ease. However, you’ll need to have your personal shipping carrier account information on hand and complete the configuration for each carrier before getting to the label creation stage. Let’s imagine you’ve already set up your carrier information, and we’ll skip to the part where we get to print the shipping labels.
As we already mentioned, there are two scenarios where shipping labels can be of great help: Create Labels for New Shipments.
Go to Sales -> Orders.
Select an order that is either “Pending.”
Select the Ship button, and confirm shipping info by the carrier requirements.
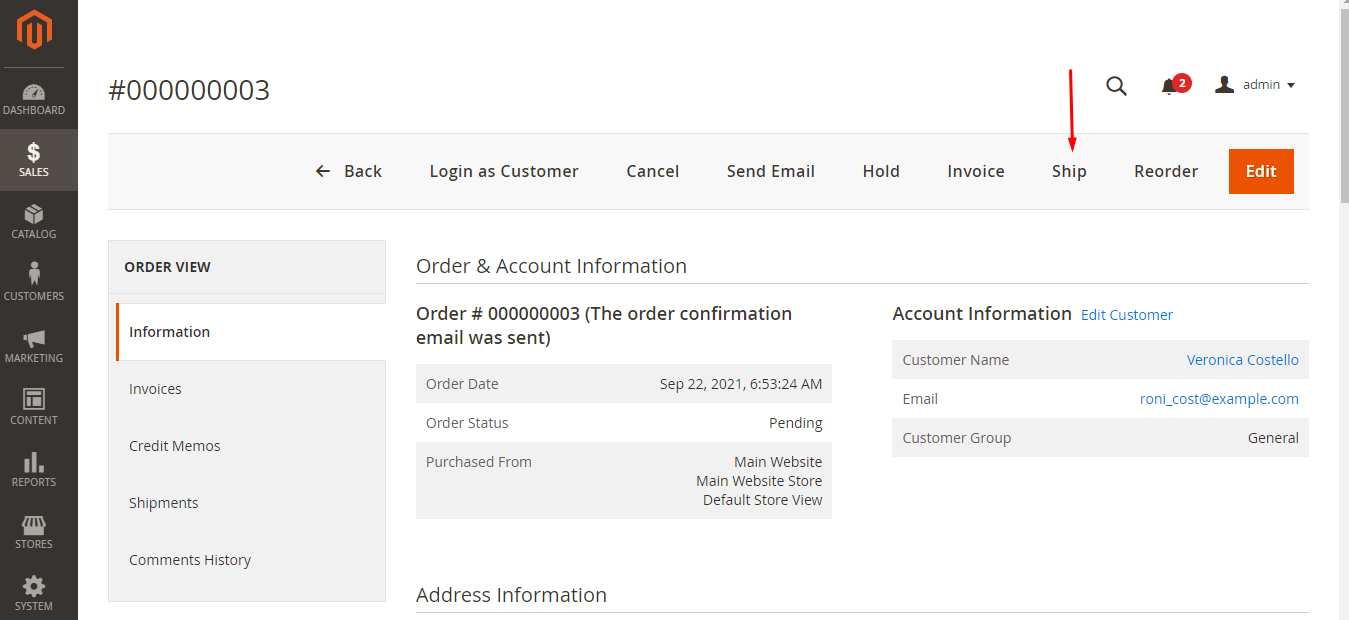
4. Then select the Create Shipping Label checkbox, and click the Submit Shipment button. Now you need to do the following:
Select the Add Products button to select which ordered products should be added to the package. After you’ve selected all the products that have to be added to the package, along with the quantity of each one, click the Add Selected Product(s) to Package button, and you’re done.
5. As soon as you click OK, Magento will connect to your designated shipping carrier system to submit the order and receive a shipping label and tracking number for every package. If this operation is successful, the tracking number will appear in the form and be ready to be printed along with the shipping label. If any issues arise and the carrier isn’t able to create the brand – the shipment won’t be processed, so this is something to pay close attention to the first few times after you’ve set up and implemented this process.
Create Labels for Existing Shipment
On the admin panel, go to Sales -> Orders.
Select a shipping form for an existing order and do as follows:
In the section Shipping and Tracking Information, click Create Shipping Label Note the designated products contained in the package, and select OK.
Note: To see the complete package info, you’ll need to click Show Packages. As you see, there’s no need to have a degree in Rocket Science to master Order management in Magento 2.
Top Magento Order Management Extensions to Expand the System's Capabilities
The basic Magento version includes a lot of order opportunities. However, if it doesn’t completely cover your business needs, there is a great variety of extensions that you can use to extend order functionality in your Magento store.
We have listed some of the order management extensions available on Magento Marketplace:
- ✔RMA;
- ✔Order Editor;
- ✔Extended Orders Grid;
- ✔Order Management;
- ✔Order Comments.
RMA
Price: $299
Compatibility:Open Source (CE) 2.3-2.4
The RMA extension for Magento 2 sends requests both from client accounts and special forms for guests, as well as from the administration panel. An admin can decide what information to request for the return, thanks to all custom fields of the RMA form, and also keep track of all requests from the dedicated network. A very important point is that clients can monitor the progress of the request and exchange messages with admins.
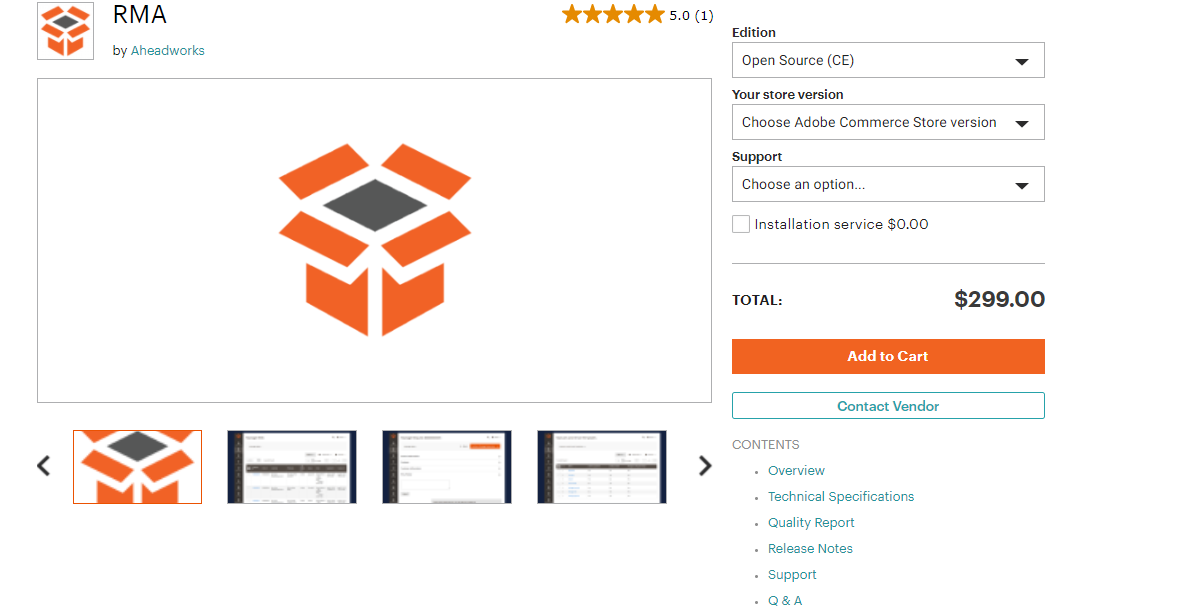
Extension features:
- ✔General settings;
- ✔Request status;
- ✔Custom fields;
- ✔Guest returns;
- ✔Request grid;
- ✔Canned responses;
- ✔Message thread;
- ✔Returns section on the order view page;
- ✔Migration tool.
Order Editor
Price:$149
Compatibility:Open Source (CE) 2.3-2.4
With the help of the Order Editor extension, you can change the configuration of your orders after they have been placed, add or remove products, change prices, and you can also adjust such important parameters as the date, time, or even the status of an order.
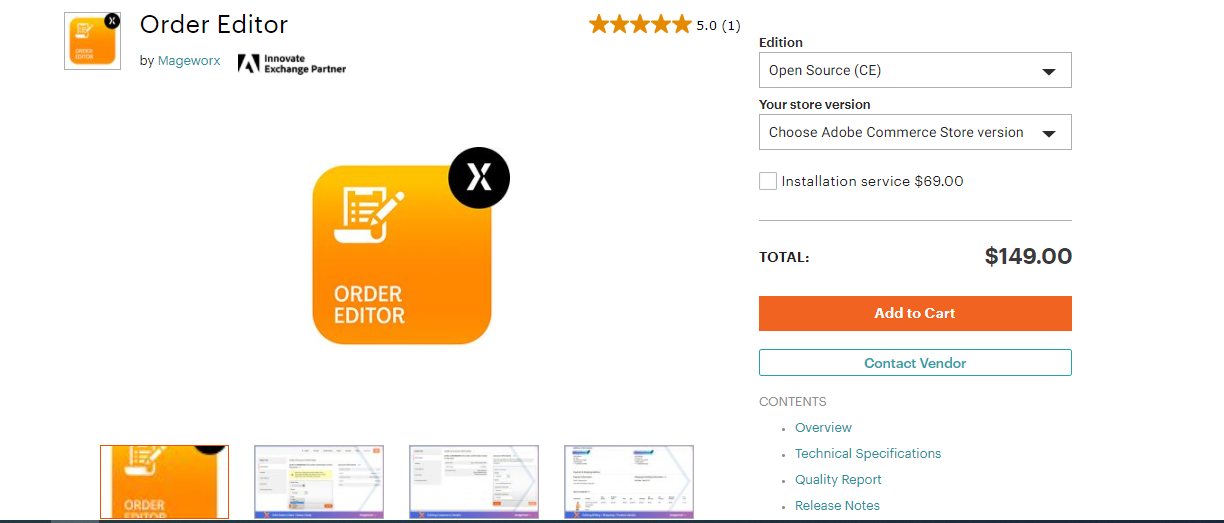
Extension features:
- ✔Change order details;
- ✔Modify main order details;
- ✔Change billing or shipping info;
- ✔Previewing order’s total.
Extended Orders Grid
Price:$99
Compatibility:Open Source (CE) 2.3-2.4
This extension allows viewing a grid of sales orders and getting complete information on any order in a single place. The functionality of this extension does not offer any changes by default, Extended Orders Grid can make all the necessary grid settings depending on the needs of your business.
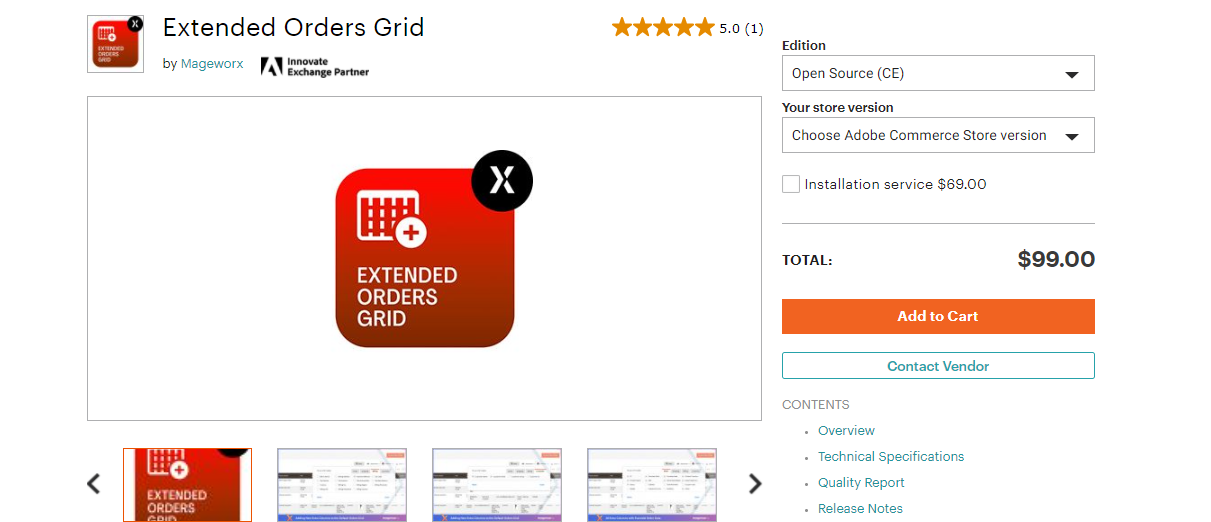
Extension features:
- ✔All necessary information and order data in one place;
- ✔According to the needs of your business, you can set up a standard grid of sales orders;
- ✔Add additional columns for a comprehensive overview of each order.
Order Management
Price:$199
Compatibility:Open Source (CE) 2.3-2.4
With the Magento 2 Order Management Extension, the functionality of the platform is increased and you can manage orders from preview to final approval of orders. Also, there is a huge selection of features, such as adding or removing a product, changing shipping, billing information, and more.
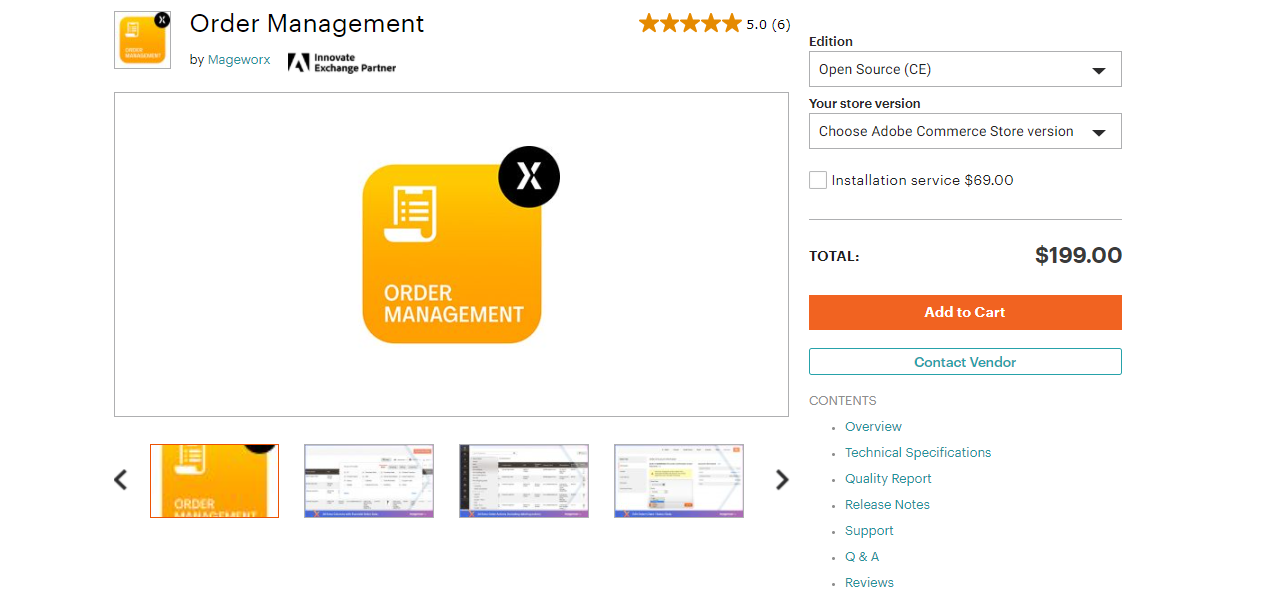
Extension features:
- ✔Сomplete overview of all order data in one place;
- ✔Set up a grid of orders, plus you can include only those data that are really very important;
- ✔Add or hide extra columns.
Order Comments
Price: free
Compatibility:Open Source (CE) 2.3-2.4
Order Comments extension appears on the order details page in the Magento admin panel. Customers add instructions, comments, or special requests when placing an order in the store.
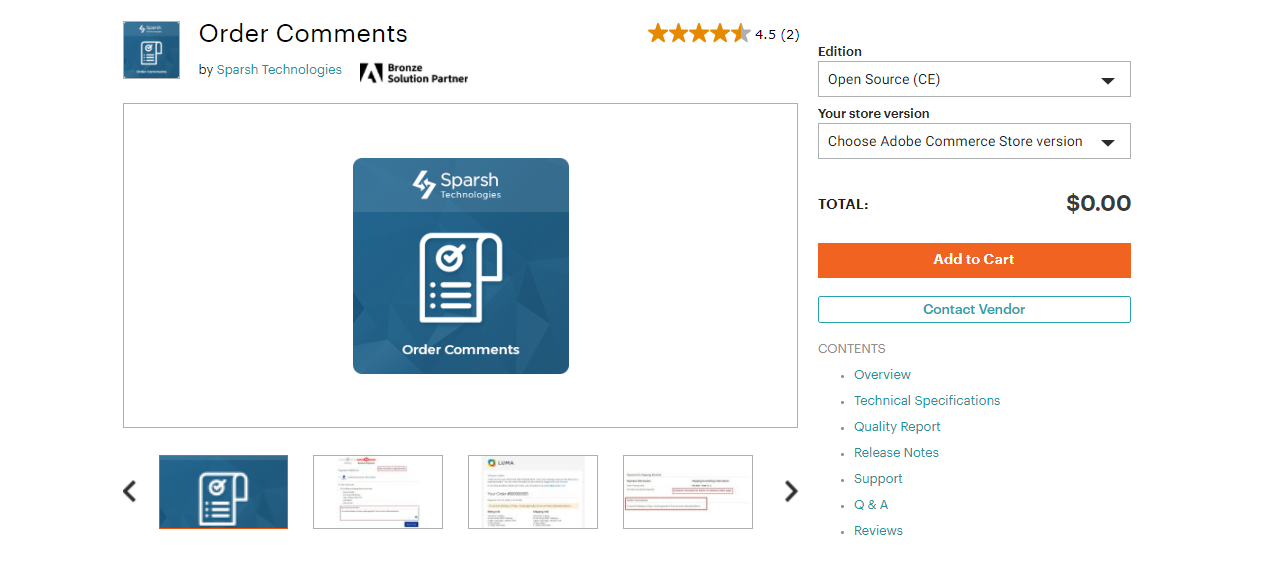
Extension takes:
- ✔Install is effortless;
- ✔Better shopping experience;
- ✔During the checkout process, customers add order comments;
- ✔Admin sees the order comments on the order view page in the admin panel;
- ✔Customers view order comments in the My Orders section;
- ✔Customers can get order comments in an order email as well.
Conclusion
But if you have some more demanding requirements to manage your orders — there are loads and loads of extensions out there to help you out and meet or exceed your expectations. Even if there are no ready-made solutions available on the market, our Magento developers can help you create a tailored solution.
Hunting for Magento development support?
We’ll be in touch soon if you leave your contact information


